Like the previous version of kaspersky internet security 2010, the new version too wont allow you to activate the license using a key file. But if you have got a genuine key for kaspersky 2011 you can easily activate it with the steps in our previous guide. Here’s how you can activate kaspersky using a key file.
If you have got a genuine serial key for kaspersky 2011, then this guide will help you convert kaspersky 2011 serial to key file. With the key file in your computer lets start. - Click on the Kaspersky license manager from the main window (seen at lower right).
- The License management window will now popup with two options for you. Click on the "Activate the application with a new license” option.
- Disconnect your internet connection and enter this code. T1JVS-NNMBD-K1QTN-SUBP8.
- Followed by that an error window will be displayed with a message "Activation error:Cannot setup server connection”. Now Click on "OK”.
 - You will now be shown with the window to activate kaspersky 2011 with license key.
![]() ...
Read more »
...
Read more »
|
You might need to completely remove the beta version of kaspersky internet security 2011 or antivirus on installing the latest version of Kaspersky Internet Security 2011. Some times you might not be able to remove the old version of kaspersky completely to continue with the installation of new version. If you are in a situation like that here’s the official tool from kaspersky to remove kaspersky internet security 2011 or antivirus from pc completely.
Kaspersky Lab Products Remover tool can completely uninstall the kaspersky products from your system. The tool is free and portable and is compatible with windows xp, vista and windows 7. To remove a particular kaspersky product, run the tool and enter the product code in the required filed from the picture shown. 
Then select your desired product and click on the Remove Button. 
The desired kaspersky product will be removed completely from your pc. You might need to restart your pc after the installation
|
Here are some methods to recover your BIOS password. - Remove the small battery seen in the mother board.
- Turn on the system without the battery.
- Your password will be reset.
- All your changed bios setting and system time will be set to default.
- Now turn the system off.
- Put the battery again.
- If you are not willing to remove the battery, try resetting the clear CMOS jumper on themotherboard.
If you don’t want the methods mentioned above go for a BIOS password recovery tool like Pc CMOS cleaner.This is an .iso file which you need to burn to a disc and boot from it.It can reset /reveal your BIOS password. Download CMOS Cleaner. There are other tools like !BIOS which can recover BIOS passwords but this software sometimes causes errors.If you prefer to use it then use it at your own risk.
|
I know many XP users who have seen Windows Vista Aero interface will never forget it.It needs good hardware requirements and Windows Vista(except Basic and starter editions).So although you have Vista installed you wont get the eye candy due to hardware limitations . But there is a way to get the glass window borders like in vista on XP or Vista basic.There is a software that requires very little hardware requirements for getting it.It is called True Transparency.It changes the normal window borders to glass as in Vista. Download True Transparency Now to get the 3D flip effect in windows a software called Winflip.It can give the 3D flip effect you see on Vista.It can be activated by pressing the windows button and the tab button.Hold the buttons and scroll through the open windows. Download WinFlip Now to see the small thumbnails of open windows like in vista. The software is Visual Task Tips. It requires very little memory to run.To get the preview of a window hold the mouse pointer over the window on the taskbar. Download Visual task tips The best of the best is that the above mentioned software’s are free. To get a desktop almost similar to Xp there is a transformation pack that change the complete look of Windows XP to Windows Vista it is about 22.3 mb.But it contains the above mentioned programs and a vista theme and more.If you want an interface just like vista go for it. Download Vista Mizer After installing it select the dark XP theme from windows it will give the look almost similar to Windows Vista.
|
If your drive is positioned away from you no need to stretch your hand to reach it.Just use the shortcuts.In fact this will surely make your work a lot easier and faster. Here is a very useful trick that will enable you to open and close your drives using just keyboard shortcuts.
Just follow the steps below. - Download tooler from here.Its just a few KB.
- Start the program and create shortcuts to eject and close CD/DVD drives.
- I recommend not to create the shortcuts on the desktop as it could be annoying instead go for the Programs menu.
- Then click start then on programs you can see the shortcuts here.
- Right click the shortcut and see its properties.There you can see an option called ‘ Shortcut key.Assign a shortcut for it. Like Ctrl+F9 for example to Eject.
- Just do the same for the shortcut to load the drive and assign a shortcut like Ctrl+F10.
- That’s it done.Now on pressing Ctrl+F9 will Eject he drive and on pressing Ctrl+F10 will load the drive.
- Feels very comfortable now right!.
|
Windows 7 come with a feature called the aero snap feature.This feature enables us to Maximize, Minimize, Resize a windows by dragging / dropping it to the corners of your screen.This is a very handy feature that Windows 7 provides.This feature can be made available in windows Vista and Xp too. To snap a window just drag it to the side of your desktop or if you want to maximize a windows just drag it to the top of the desktop.When it drag it to the previous position, the previous window size will get restored.This will also work with multiple monitors too. This software is just in its developing state hence not stable so please take care.But you can experience the aero snap feature on Vista and Xp.
|
Windows Vista features a technology called the ‘Ready Boost’ which uses flash memory,SD cards,USB 2.0 drives or any flash storage device as disk cache or as a drive.This feature boost’s reading and writing up to 80-100 times faster than the hard drives.This feature is integrated in Windows Vista by default. Windows XP users also can enjoy this feature with a small software called eboostr.This software is available at a small price.So rather than upgrading to Vista it is worthy to go for this if your aim is Ready Boost.This application improves the system responsiveness and speeds up system booting and application launches.This software is compatible with all Ready Boost compatible USB drives.
|
"Aero shake” is really cool feature of windows 7.This feature helps to minimize all the open windows except the one which we are currently working with.To operate this all you have to do is just to shake the window you prefer.That’s it all other opened ones will be minimized except the one which you want.
Here is a great utility that helps to get this feature in Windows Xp and Windows Vista. Download "Aero shake” for XP and Vista now
|
The most awaited vista like windows explorer for windows Xp is here. It gives the same eye candy you see in vista in Xp.The most interesting thing is that it needs only little resources.Allthe Windows Xp users can now get a vista explorer to their desktop now. As you see in the image the vista like address bar is also available in this nice piece of software. The search bar is embedded into it which helps to access your desired files quickly. And Above all the software is small as 334.34 kb in size.This product was developed by lee soft.The software is in it beta state so may have some minor bugs until the final and stable version is released so keep updated by subscribing now!!.
|
How about browsing the windows explorer as we do in Internet explorer and Mozilla Firefox. Well, QTTabBar is a small utility that helps to get the tabbed browsing feature in both Windows XP and Windows vista. Here is a small tutorial about how to use the tool. 
You can get the program from qttabbar.wikidot.com. You need to have Microsoft.NETFramework 2.0 installed to operate this program properly you can get it frommicrosoft.com . If you are using windows vista make sure you run the installation by rightclicking the installation file and selecting the ‘Run as Administrator’ option.
|
I had written a post on how to make pendrives bootable earlier.But if you are in a situation that you Bios don’t support booting from USB or from a CD. There is a boot manager calledPLoP which can solve this problem very easily.This program can do the job even without installing it on the hard disk.
This PLoP boot manager can be launched from almost any where fro mfloppy drives, networks or from any other boot manager, even from DOS and windows boot menu. To use this software Download it from here and visit the distributors website from here and follow the instructions given there. When the program is launched you can boot from USB or a CD even when your motherboard/ BIOS don’t support it.
|
What about minimizing all windows as thumbnails on your desktop?. It will be very easy to identify the required windows and your work will also speed up. Yes this is possible.A small utility called miniMIZE can do this job for you. Currently this software works both on Windows Xp and Windows Vista.This software has option to start automatically with windows, so you don’t have to start it every time on each boot.Option for changing the thumbnail size, adjusting thumbnails position on desktop, changing opacity etc. are also there. More over this wonder utility is Free!.

Download MiniMIZE nowHome page
|

Aero Peek is a cool and unique feature on Windows 7. Let me tell about it shortly. This is found as a small rectangle present last on the Windows 7 taskbar.
When you hover your mouse cursor over it you can see through all the maximized widows ie. all the maximized windows becomes transparent and only their outline will be showed. 
A small application created by GeeQ can bring this effect in Windows XP and Windows Vista too. So from now on all the XP and Vista users also can enjoy this unique Windows 7 feature. Download Aero Peek Utility now
To use it click on the icon in the
...
Read more »
|
Some times Windows refuses to delete some files when we try to delete a file that is supposedly in use. But you know very well that you have not opened that file or the files is not currently being used by any software. This is really a irritating situation. Here is a solution to delete those blocked files.
A small software called ‘ Process Explorer ‘ can relieve you from this situation.It will help you to end the corresponding program that is using a particular file without much worry!.Using the program is easy. Open the ‘ Find | Find Handle or DLL’ to find the application you want to close. You may enter the file name displayed in the windows error message and do a search. The program which is using that file will appear in the process column. Now things are more easy just right click the corresponding program and select ‘Kill process’. This will terminate the program that is currently using the file and now you will be able to delete the file without any problem. Process Explorer has many more features it can be used as a replacement to the default Windows Task Manager and its free too.! Download Process Explorer
|
The ” Most frequently visited ” Folder in the Bookmarks toolbar will help you to search through your favorite site’s faster. What will you do if you have accidentally deleted them or overwrote them during backup of your computer and you are in need of them to find one of your favorite site.
This is really a problem in Firefox. No option is provided with it to get back the deleted bookmarks once it is gone!. This is so because the bookmark library is a very small database and you need to define a query for that.Here is a solution to recover them. - Right click on the bookmark symbol bar and select ” New bookmark ".
- Give ” Most frequently visited websites ” as the” Name ".
- Now type this query in the address field ” place:queryType=1&sort 8&maxResults=20 ". Type this carefully.
- Confirm by clicking ” Add ".
- Done!
Now i will saw how this works. You ask to pull the results from the browser history with ” queryType=0 ” and sort them in decreasing order of visiting frequency with ” sort=8 ” and maxResults=20 will decide how much entries should be displayed. It can be given as you wish it can be 20 or 30 or 40.
|
Most frequently used programs such as e-mail clients, file sharing tools etc should run continuously. Some times these programs get crashed or get closed by mistake. So again we need to start them from the beginning. Instead of this if the programs start automatically by itself our work will get done more faster. You can automate this task of continuously checking whether the programs are active or not.
A tool called Monitor will do this task for you. So you don’t have to bother again about those programs again. The program will automatically check whether the software’s are active or not and will restart them accordingly.Download the program from the link given below. When the program starts, click the "Add” tab and give a name in the "Name” and click the tab next OT "Path” to select the program file which needs to be monitored from the file dialog. You can even specify the parameters in the "Arguments” Section. Do not change the checking interval and create an entry for monitoring by clicking on "Create”. Now all you need is to activate the check box seen in front of the respective task to start the automatic process. Download Jockersoft Application Monito
|
How about Getting more Features when you right click on a window or on when it is on the taskbar. Many features such as Hide Others, Hide All, UnHide All, Unhide, Minimize to systemtray, Transparency are there. You can use this wonderful utility and get full control over the windows. I say this is a must have utility for all the Windows Users.

You can make a process run faster by giving it a high priority and there by making your work faster than before. You can hide an opened window so that even by pressing Alt + Tab wont find it. Best of all this program is Free. Instead of wasting your taskbar area you can Minimize the windows to the system tray as small icons and more.This wonderful utility was created by one of my friend and software engineer Arif Ali.Download Process Manager
|
The thumbnail Preview Feature in Windows XP is very useful for identifying the Image files Quickly especially when you have a lot of image files in a directory. But the Thumbnail Preview is very limited for files like TIF, PCX, PSD etc. it shows only the icons of the files. Here is a software that can increase the functionality of the Windows Thumbnail Feature.
‘ ThumbView Lite ‘ a free shell extension for windows can support 19 more graphics formats so you will be able to preview almost all the image file formats. This program will automatically integrate into Windows and there is no need for a separate program to be launched. This tool will also enable windows Explorer to display main properties of the respective file types. Scarily used file types like EPS and CDR will be displayed as icons.Download ThumbView Lite
|
 You might have faced a situation where you need to leave your computer in front of some body, your friends or relatives. You have some private data in your pc and you don’t want any body to do any thing with that. That is just one case. You might be also in trouble if some body delete important files in your system. You might think if there was any option to disable or remove the cut, copy, paste and delete functions in windows. Then wait here is a way to disable the Cut, Copy, Paste and Delete functions.Here is a small standalone (run without install) application that will simply deactivate or disable the cut, copy,paste and delete functions in windows.All you have to do is to run this application and you will get the required options disabled. You might have faced a situation where you need to leave your computer in front of some body, your friends or relatives. You have some private data in your pc and you don’t want any body to do any thing with that. That is just one case. You might be also in trouble if some body delete important files in your system. You might think if there was any option to disable or remove the cut, copy, paste and delete functions in windows. Then wait here is a way to disable the Cut, Copy, Paste and Delete functions.Here is a small standalone (run without install) application that will simply deactivate or disable the cut, copy,paste and delete functions in windows.All you have to do is to run this application and you will get the required options disabled.
When you want the Cut, Copy, Paste and Delete options again in windows you just need to press Ctrl + Shift + Esc and the Task Manager will open up. And just stop the process named stopper.exe in it by right clicking it and selecting End Process. But if some experienced users come they will easily get the options you disabled back just by doing the above step. So you can rename the file to some thing similar to system process like winlogon.exe or system.exe etc.. so no body can easily find it out. you can make this application to start along with windows. To do it just create a shortcut of this program and paste it in the start up folder of windows. You might ask ” Can’t the user copy cut and paste by using the windows shortcuts”?. The answer is no. This program will also disable the windows shortcuts too! and yes one more it will work with all the windows versions. You can now leave you pc to your friends or anybody you like without fear. Download the utility from here
|
You may have seen many softwares for downloading streaming video and audio from popular video sharing sites including web sites with anti-leeching protection. You may have also seen many tricky methods which are a (bit difficult) used to save the videosdirectly from Youtube, Metacafe, Dailymotion etc. Long back ago i used to record the vidoes in you tube, metacafe etc. using screen recording softwares and the result was the filesize was huge. Now here’s a Freeware Utility to Download Videos and well as audio from almost all Popular video sharing sites without any hassle…………
There are many popular sites that too help to save the videos to your PC online. TubeMaster Plus is a freeware utility that will help you to save or download videos and audio from almost any popular video sharing sites like YouTube, DailyMotion, Deezer, Jiwa and more… What makes this software stand out from the rest is that it has a good options for converting the downloaded or saved videos. You can watch the downloaded file in flv format (Tubemaster format) or you
...
Read more »
|
You might have seen various pictures popping up in the INTERNET causing rumors etc. The pictures may be sometimes original or may be edited(fake). These days it is very easy tocreate a original looking picture just by using softwares such a Adobe Photoshop. So we will not be able to distinguish the original and edited (fake) photo. But here comes a new software that can do this job. ie it will identify a original and edited image……..
JPEGsnoop is a free software and will help us to check whether an image has been edited before or not. This software can decode the hidden details contained in a photo Jpeg and motion AVI files. JPEGsnoop analyzes the signatures contained in its internal database with the model of the camera which is used to capture the image or photo with a numerous number of compression signatures. When the signatures matches that of Adobe Photoshop, then we can be sure that the image has been edited.Here are a few screen shots showing Original Image Signatures and Edited image Signatures.
...
Read more »
|
The Text in the Title bar of Windows helps us to identify which one is it. It may help some times. But in Windows 7 by default the text won’t show up. Only the blank title bar will show. So here is a small utility that will bring back the text in the title bar of Windows 7 operatingsystem.
"Aero Bar” is a small utility that will bring back the text feature in Windows 7. Utilities such as NotePad, Calculator etc. will show the text but Windows Explorer won’t. So this application will do it. in Windows 7") All you have to do is download and run it. Thats all. Form now on you will get the text in Windows Explorer too. Download Aero Bar now
|
The Windows Restore Utility is really a magical utility that we need. It comes to our rescue in needy situations like system wont boot, system is corrupted by virus etc. So most Windows users need to create a System Restore Point most often. As i said in the earlier post Windows usually creates System Restore Points automatically, but we cannot depend on that to be happened. It may or may not happen some times. And that too is a reason toCreate A System Restore Point Manually. You need to go through many steps and wizard to do this. So here is a nice and fast way to Create Restore Point with Just One and Only One Click………
 Single Click Restore Point is a small executable file that do this job in a flash. You only need to be logged into Windows with administrative Rights and just run this utility. This utility does’t have an interface only it shows a Message saying that a Windows Restore Point is Created. Just that and the Restore Point is created in just One Click. The only problem is that you can’t name the Restore Point Created. It will be named by the date along with the name ” Created With SCRP Tool ” (See the Screen Shot). Single Click Restore Point is a small executable file that do this job in a flash. You only need to be logged into Windows with administrative Rights and just run this utility. This utility does’t have an interface only it shows a Message saying that a Windows Restore Point is Created. Just that and the Restore Point is created in just One Click. The only problem is that you can’t name the Restore Point Created. It will be named by the date along with the name ” Created With SCRP Tool ” (See the Screen Shot). 
This tool will help users who struggle to Create System Restore Points in Windowsby navigating through the control Panel. Those users will surely happy with this utility. Download Single Click Restore Point
|
While working with windows you tried to copy a file but unfortunately windows won’t allow you to copy that file and also display a message that the file is being blocked by a program. Moreover you might be in very need of that file. There is a way to copy the blocked files. You can copy any file that is blocked by a program. By default Windows will never allow you to copy a program/file that is currently being used by windows. Most probably you will face this situation when you try to copy video files that has just been played in your browser it may be Internet Explorer in most cases. I used to do this before and ” i can’t copy a file that is being used” . There are certain sites that block files this way. So i tried to find a solution (to copy any files that are blocked by a program) for this.
HoboCopy is a small utility that can do the job of copying a file that is being used by a program. It is actually works like a backup
...
Read more »
|

Nero is very popular software which was released for the purpose ofburning DVD’s, CD’s and other medias. The whole Nero Application is a whooping 370.5 MB in size (latest). The latest version included many scarcely used application software’s such as Media Player, Video Editor, Audio Editor, Photo Manager. Etc. but we mostly use Nero to burn the DVD’s, CDs and many of the users rarely use the other unwanted applications that come with the software and most times we wont use them at all. This is mainly due to the reason that there are much better alternatives for such applications too. For e.g. Audacity is a full featured and a nice alternative to the audio editor program that comes with Nero. The version 3 of Nero Software included only the DVD and CD burning feature only. But the latter versions arouse with many bloated stuffs that are mostly not needed by the users. Why a Burning Program should include such bloated applications. This was only the trick used by the manufacturers to sell their newer versions. After installation of Nero software it will eat up to 1.5 GB of our hard disk space simply without any use for us. Of course there are few user
...
Read more »
|

Many of the internet users know about Techsmith Camtasia software. TechSmith Camtasia Studio is a great software that can record screen activity as videos, edit and narrate the
clips, and publish the finished presentation in standard video formats. Techsmith Camtasia can be used to Develop videos that introduce new software, train new users of existing software, or create any kind of active documentation.Distribute the videos as standard AVI files or as streaming presentations from a website..You can edit those videos and share them. The Full version price of Techsmith Camtasia 3 is about 200$. You can get this pricey full version of Techsmith Camtasia 3 absolutely free. Techsmith Camtasia features :- Record any screen or desktop activity and save them as videos.
- You have the option to set Shortcut keys to start and stop recording, thus making
...
Read more »
|
 Mac Operation system has very appealing user interface. How about getting Mac OS X interface in Windows Vista? Leopard Transformation Pack 2 will transform Windows Vista To Mac OS X Interface. Leopard Transformation Pack 2 can give the look and feel of Mac OS X interface in Windows Vista. Mac Operation system has very appealing user interface. How about getting Mac OS X interface in Windows Vista? Leopard Transformation Pack 2 will transform Windows Vista To Mac OS X Interface. Leopard Transformation Pack 2 can give the look and feel of Mac OS X interface in Windows Vista.
Before You install the Leopard Transformation Pack 2 for Windows Vista you need to have the uxtheme.dll file to be patched and for an added safety create a system restore point too (will be handy if any thing goes wrong). Install the Leopard Transformation Pack 2 in the SafeMode with Administrator rights for a successful installation. Screenshot of Leopard Transformation Pack 2 Installed in Widows Vista
Before Transforming Windows Vista to Mac OS X Leopard Read this tooYou must read these important instructions given by the author before installing the Leopard Transformation Pack 2 for Windows Vista.
Currently the Leopard Transformation Pack 2 is only available for Windows Vista (32 bit) with SP1
...
Read more »
|

My favorite browser after Mozilla Firefox is Opera. I simply love it because it is simple and speedy and feature rich. Till now it haven’t got any good way to save flash videos in Opera. I usually digg in the opera cache to save the flash video which i watched earlier. But this is really a tiresome task. Another way was to depend on video saving websites but they too caused some or other problems in some way. But the wait is over. Here is some thing good for all video lovers using opera. Flash Video Save Adapter is an excellent addon for Opera that will help you to save flash video through a mere right click menu. From now on you can save flash videos in opera with out the need of video saving websites or probing in the opera cache. Yes this is some thing you might have been looking for saving flash videos is Opera. The Flash video Save Adapter is a separate application that will automatically integrate into the opera browser. When we play a video in Opera a small icon will appear in the top-left corner of the video being played. Take a look at the screen shot. 
When you want to save the video being played Right Click on the small icon and choose "Save this flash video”. The video will be automatically downloaded into your computer. How to use Flash Video Save AdapterYou need to simultaneously launch Opera and the Flash video Save Adapter program together. Flash video Save Adapte
...
Read more »
|

Mozy and carbonite are two backup solutions. Both of them will help you to backup your important files and folders online. But both of these backup solutions are not free. Here is how to get a free license of either one of these softwares.
Carbonite is a simple, safe online backup service for casual home computer users, students, home office users, business travelers, etc.Carbonite offers unlimited backup solutions for just $54.95 per year. Thats less than 5$ per month.
Mozy is also a similar bacup solution with nearly a same price as Carbonite Backup.
My friend from AvinashTech has organized a giveaway. He offers a free one year license of Mozy or Carbonite Backup. It costs $54.45 per year.If you like to get a free license of Mozy Backup or Carbonite Backup, Go Here.
|
 Here comes a great utility for all windows 7 lovers. Windows 7 has the new support for changing the logon screens without the need of any external softwares. So if you need a change in logon screen you need to manually apply a new image to be displayed at the logon time. Forget about that.! Here comes a great utility for all windows 7 lovers. Windows 7 has the new support for changing the logon screens without the need of any external softwares. So if you need a change in logon screen you need to manually apply a new image to be displayed at the logon time. Forget about that.!
Windows 7 Logon Screen Rotator is a nice utility that will help you to display upto 10 random logon screen images at logon. luke_smily_face from Neowin.com created this nice utility. You can choose your favorite 10 images and Windows 7 logon rotator displays them randomly during login.
 After selecting your favorite images at logon jusr click on "Enable Settings and Exit”. Then a windows will popup asking you which logon screen to be displayed during the first login. Enter the number corresponding to your favorite image and Press "OK”. After selecting your favorite images at logon jusr click on "Enable Settings and Exit”. Then a windows will popup asking you which logon screen to be displayed during the first login. Enter the number corresponding to your favorite image and Press "OK”.
During each time from now on different logon screen’s will be displayed with your favorite images.
If you dont want this feature and need to remove it, then just run "Remove files and settings.exe”, which comes along with Windows 7 Logon Screen Rotator pack.
Your Default logon screen will be restored.
|

Here is how you can Get Full Version of Everest Ultimate Edition 100% legal Genuine License for Free. Yes you can get the Free license of Everest Ultimate Edition which costs $34.95 for Free. Well if you dont know what Everest Ultimate Edition is, then i will give you a small explanation about it first. Everest Ultimate Edition is an advanced system benchmarking software. It will give you the A-Z information about your system.
Here is what the company says, EVEREST Ultimate Edition is an industry leading system diagnostics and benchmarking solution for enthusiasts PC users, based on the award-winning EVEREST Technology. During system optimizations and tweaking it provides essential system and overclock information, advanced hardware monitoring and diagnostics capabilities to check the effects of the applied settings. CPU, FPU and memory benchmarks are available to measure the actual system performance and compare it to previous states or other systems. Furthermore, complete software, operating system and security information makes EVEREST Ultimate Edition a comprehensive system diagnostics tool that offers a total of 100 pages of information about your PC.
Here is what you have to do to Get the Full Version Free License of Everest Ultimate Edition
|
 There might be many mouse gesture applications around in the web but there is nothing that could pose a strong rival to StrokeIt. This great mouse gesture application popped into the wild almost 8 years ago. But after February 2005 it seemed like the programs development staunched. Now Stroke it is again back in action! the program developer came up with the news that StrokeIt version 0.9.6 will run in all windows versions starting from Windows 95 to the newest Windows 7. There might be many mouse gesture applications around in the web but there is nothing that could pose a strong rival to StrokeIt. This great mouse gesture application popped into the wild almost 8 years ago. But after February 2005 it seemed like the programs development staunched. Now Stroke it is again back in action! the program developer came up with the news that StrokeIt version 0.9.6 will run in all windows versions starting from Windows 95 to the newest Windows 7.
The developer had added a new portable feature too. So taking the program along with us on the go wont be a problem. This is what the developer says about StrokeIt.
StrokeIt is an advanced mouse gesture recognition engine and command processor. What is a mouse gesture? Mouse gestures are simple symbols that you "draw” on your screen using your mouse. When you perform a mouse gesture that StrokeIt can recognize, it will perform the "action” associated with that gesture. In short, it’s a nifty little program that lets you easily control programs by drawing symbols with your mouse.
StrokeIt can currently recognize more than 80 unique mouse gestures and can be easily trained to recognize many more. For each gesture recognized, StrokeIt can execute a user-defined set of commands within the active application. StrokeIt commands are defined within pluginlibraries that can be easily created by third parties to do nearly anything.

The program supports Safari and Google Chrome too. StrokeIt can currently recognize over 80 programs. And with all these superb features available the program is absolutely Free for personal use. Download StrokeIt
|

We work with a lot of applications daily. We open and Close many applications frequently. Usually after closing an application we then decide to reopen it (thinking there was no need to close that application at that time or we need to use that again). Things go worse when we close an Application like Word or notepad accidentally after typing a lot! We mostly encounter these type of situations. Programs like Adobe Photoshop, Pain Shop Pro etc takes some time to load. Closing and opening those applications frequently then becomes a time killer. So here is a small tool that will help you to Re Open or Recover the Closed Programs / Applications in a jiffy. GoneIn60s is a small application that will help you to Re Open or Recover the Application that has just been closed. This small application becomes really helpful when you have closed an Application with no intention of closing that application and it has just been closed now. The logic behind GoneIn60s is that the program will delay the shutdown to programs by 60 seconds. The program will be kept in memory for a period of 60 seconds. When you hit the close button of an Application / Program, you will see the program gets closed as usual without any time delay, but the program will be kept in the memory for a time period of 60 seconds. This is how GoneIn60s works. Features of GoneIn60s GoneIn60s is not a resource hungry application. It will remain in the system tray silently. The 60 seconds that the program offers could be easily Adjusted through the ‘Settings’ option of GoneIn60s 
There is also one nice feature added. IF you don’t want any application to be kept in the memory, then you can add that programs to the white list. For eg if you want "calculator” not to be kept in memory just add calc.exe to the " Programs to ignore " area. How to Use GoneIn60s When you want to Re Open or Recover the recently closed program just right click on the GoneIn60s icon in the System tray and you will see a list of recently closed programs. Now Select the Application / Program you want to re open or recover. It will open in the blink of an eye. 
GoneIn60s is freeware and works with Windows 2000, XP,Vista and windows 7 too. Download GoneIn60s
|

Before the arrival of smart Phones we used to keep our favorite movies in DVD’s and in our computer. With the arrival of Smart Phones and gigantic storage spaces we started carrying movies and videos gradually. The arrival of iPhone in the mobile phone world was a great buzz and the iPhone was sold at a record breaking rate. iPhone/ iPod Touch has a decent storage space for carrying a few of our favorite movies. But the problem is that how to make the big movie we see in our computer suitable for the iPhone/ iPod Touch to play? We can easily purchase our favorite movies from the Apple iTunes Store suitable to play on iPhone/ iPod Touch. If we already own the movie’s DVD why there is a need to waste money purchasing it again? We can easily convert the movie to a video file and save in our PC and then transfer it to our iPhone/ iPod Touch. There is a free ware software called HandBrake that will help you to convert DVD to iPhone/iPod Touch format easily. What makes HandBrake special is that it is available for both Windows and Mac. So, Here is How To Convert DVD’s to iPhone/iPod Touch format using HandBrake- Download the HandBrake software from http://handbrake.fr/?article=download and install HandBrake on your computer.
- After installing HandBrake insert the DVD with the movie to your DVD
...
Read more »
|
PNG and JPEG optimizing softwares are just simply helpful especially for web users. There are a lot of PNG and JPEG Optimizing softwares for Windows users. On the other side the numbers are less for Mac Users. ImageOptim is a Nice and Sleek utility for MAC users to Optimize PNG and JPEG images in their MAC Operating System. ImageOptim will make the JPEG and PNG optimization job dead simple.
ImageOptim is a great boon for webmasters as it will compress the image, save for web and reduces the image size.

ImageOptim make the PNG and JPEG images smaller (in terms of disk space) by finding optimal compression parameters and by removing unneccessary information, like file comments, EXIF tags and color profiles.When the images get smaller without much loss of quality you webpages will load pretty fast without consuming a lot of bandwidth and saving the users time. ImageOptim is a must have utility for webmasters. Download ImageOptim
|
Here is How to Extract Text From Images For Free
- JOCR is a Freeware developed by EverRex Software that will help you to do this jobeasily. JOCR will capture the images on your screen and then convert the captured image to editable text document. The use of JOCR really becomes important when we need resurrect the protected files whose text can not be copied. JOCR can extract the text from Web pages, PDF files, error messages too. So JOCR could be used to copy the text on a blocked website easily. It offers many capture modes.

You need to have Microsoft Office 2003 or higher version for JOCR to work. JOCR supports a wide variety of languages. - Free-OCR.com is a Free Online Service to Extract Text From Images for Free. This free
...
Read more »
|
I am sure that many of us had come across a situation in which we would be in a dilemma to use which program to open an unknown file format (extention). We usually search in the internet for the correct program to open that unknown file format (extension). Forget those painful days when the new OpenWith.org Desktop Tool is available. OpenWith.org Desktop Tool makes it easier to find the correct program to open unknown file formats (extension). Once the installation of OpenWith.org Desktop Tool desktop is completed the users can use it directly. When you right click on an unknown file format (extension) an option will be automatically displayed in the right click menu as "OpenWith.org – How do I Open This?”. When you click on that option, OpenWith.org Desktop Tool will search on your system for any suitable program to open the file (extension) if the required program is not installed in your system then OpenWith.org Desktop Tool will search the internet automatically and provide you with the download link of the suitable program to open that unknown file (extension).

OpenWith.org Desktop Tool
...
Read more »
|
DVD, CD and BD media keep their data only for a limited period of time. And the data starts to degrade slowly. It might be possible to get back some files on the DVD’s or CDs but in case of one single big file of some 650 MB or like wise things become hard. Even if a small part of that file gets unreadable we lose the whole file. You might have got errors such as "Cannot copy file: Data error (cyclic redundancy check)" / "Cannot copy file: Cannot read from the source file or disk” like wise. The invasion Flash Drives and portable hard disks have still not affected the market of CDs and DVDs and the latter are still the most widely used storage mediums. Their cheap price is the main factor behind this gain. DVD’s and CDs are cheaper but they lack one defect. DVDs and CDs gradually degrade with time. In the earlier days i used to take backups of my important data to CDs and keep them safely (almost at a dust proof place). I thought that even after long time my data would be safe. My PC’s hard disk used to work 3-5 hours during those days. So i thought that it would be safer to store and Keep the data in CDs rather than keeping on my Hard Disks. But when i tried to read the CD after a very long time but every time it failed. The CDs were not able to read except very few.  But there is happy news for all. There is a way to Protect DVD, CD or BD Medias from future damages. We can still recover the data stored in them very easily. But there is happy news for all. There is a way to Protect DVD, CD or BD Medias from future damages. We can still recover the data stored in them very easily.
Thanks to dvdisaster. Dvdisaster will help you to recover the data’s stored in old CDs, DVDs etc. dvdisaster is one nice software that helps us to recover data from DVDs, CDs etc. dvdisaster makes this possible by integrating some error detection and correction codes along with the burned data. So even if some read errors have developed the data will be completely recoverable. The data recovery will be possible even if the DVD, CD or BD gets scratched or gets errors due to its oldness. dvdisaster reads the original DVD or CD and then creates an error correction file which consumes a 15% of additional space. For e.g. if a CD of 700MB of data is taken it needs approx. 105MB of space for creating the error correction file and a 4.7GB DVD file needs an error correction file of approx. 700 MB space. When the DVD, CD or BD get’s scratched or encounter readability problems or errors, then dvdisaster will make use of the error correction file to correctly recover the data from the scratched DVD, CD or BD. |
Have you ever thought of controlling your Mobile actions just by simply shaking it in a particular way ? wont it be nice and fun to control your mobile phone’s actions just be shaking it ? If you are interested in it then G-Trigger is just for you. The HTC Diamond Mobile Phone used to have this technology first. G-Trigger was build to detect the shake in Windows Mobile Phones.
 G-Trigger will enhance the G-Sensor ability of your Mobile Phone. You can start a new application just by shaking your Mobile Phone in a Particular direction. You can assign the shake direction from left to right, front to back, Top to bottom and Vice-Versa. You only need to remember which particular shake will start which application, then using G-Trigger will be fun and a time saver. G-Trigger will enhance the G-Sensor ability of your Mobile Phone. You can start a new application just by shaking your Mobile Phone in a Particular direction. You can assign the shake direction from left to right, front to back, Top to bottom and Vice-Versa. You only need to remember which particular shake will start which application, then using G-Trigger will be fun and a time saver.
Screen Shots of G-Trigger    - G-Trigger”style=”float:left; margin:0 10px 0 10px;cursor:pointer; cursor:hand;width: 97px; height: 130px;” src=”http://g-trigger.kneps.com/images/stories/temp/c52e9653115280d2bb4d2bc2171ea0d6.jpg” border=”0″ alt=”Control Mobiles by Shaking – OSD Left to Right witn G-Trigger - G-Trigger”style=”float:left; margin:0 10px 0 10px;cursor:pointer; cursor:hand;width: 97px; height: 130px;” src=”http://g-trigger.kneps.com/images/stories/temp/c52e9653115280d2bb4d2bc2171ea0d6.jpg” border=”0″ alt=”Control Mobiles by Shaking – OSD Left to Right witn G-Trigger
” />
Media Players Supported in G-Trigger
Windows Media Player, S2P, Microfi Nitrogen, Core Player, TCPMP, Pocket Player
Pocket Music, Manila (TF3D) Music Tab.
ACTIONS SUPPORTED IN G-TRIGGERYou can dial a number, launch Programs, answer/Reject incoming call, Activate a profile, volume control, Media Controls, WiFi/Bluetooth/Phone radio On/Off/Toggle, turn screen On/Off, send Keys, Save Screenshots (in BMP/JPG/PNG/GIF formats), Change Wallpaper (Today Screen, Manila Home & S2U2), close/minimize active window, Show/Hide/Toggle On-Screen Keyboard, Power Off/Power On/Long Press Power Button etc. HOW TO USE G-TRIGGER FIRST
...
Read more »
|
You might have experienced many difficulties like ” Not able to Kill Running Application”, "Can’t close a Non Responding Application” etc. while working with windows. There are many such similar problems like that. Newbies will find it hard to solve these problem (not just the above two alone). It wont be easy for them to quickly solve these windows problems. So, here is a tool that has a collection of 70 useful commands which is embedded into one application for instant use. This tool will be a boon for the non-technical users.
Commands in Demand is a free handy tool for Windows 7, Vista and XP that has more than 70 commands that may be needed instantly for a purpose while working with Windows.
Commands in Demand comes with many easy shortcuts to terminate non-responsive applications, open a command prompt in a selected folder, restart Windows Explorer, view TCP/IP configuration settings, view/clear the clipboard, access system folders etc.
To make things easier Commands in Demand has categorized the commands according to were its commands are related. The commads are categorized as Application errors, Application visible window, Clipboard, Desktop, Devices, Files and Folders, Graphics, Icons, Internet, Memory and CPU, Network, System, SysTray, Taskbar, and Windows applications.
 HOW TO USE COMMANDS IN DEMANDThis tool is ver easy to use. Just install the application, run it, select the required category to execute the needed commands. Some of the Commands Available with Commands in Demand: » Applications’ Shortcuts creator to minimize applications in the System Tray.
» Clipboard real-time Editing
» Color Sample Picker
» Command Prompt starter in any
...
Read more »
|
Most people today, run multiple applications at the same time to speed up their work and time. But it becomes a head ache when many of such programs eat up the system memory and make the system slow. This really matters if you are running photoshop and other memory intensive applications on a PC at the same time with less amount of ram. Either the system gets extremely slow or hangs. When this happens our time and energy just gets wasted instead. Programs like Firefox, Photoshop, Adobe Premiere consumes and wastes a lot of memory / ram. If the wastage of ram by these applications can be controlled then the above mentioned system hangs and related problems can be solved to certain extend. So ,here is an application to optimize or reduce the memory usage and wastage of any application to a great extend.
Minimem is an application developed to reduce the memory foot print of any application. Minimem will run in the background with out interfering your work and Minimem can be set tooptimize the memory usage of any number of applications as you wish.
What makes Mimimem special is that it will give full control over what applications you want to optimize, when and how often, as well as the possibility to only optimize memory when required. Mimimem optimizes the memory usage of applications by removing as many non-necessary memory pages as possible from the selected processes.Advantages of using Minimem to Reduce Memory Usage of Applications Reducing the memory footprint of memory-heavy applications that should not e.g. web browsers or office applicationsMaking it easier to run applications with memory leaks, e.g. Firefox 2 or extremely large footprints e.g. Firefox 3Running multiple applications on the same computer e.g. web desktop tool, web browser, office application all concurrentlyUse computers that are not so recent with modern applicationScreenShot of Minimem’s User Interface
 Memory Usage of Opera without Minimem
 Memory Usage of Opera Optimized with Minimem

...
Read more »
|
 There are some guides on the internet telling you how to Upgrade fromWindows XP to Windows 7. All these guides tell you how to upgrade from Windows XP to Windows 7, but there is a limitation that you can’t transfer the installed programs in windows xp to windows 7 and also some other settings too. Windows users might have been disappointed when it was known that there is no direct upgrade option available fromWindows XP to Windows 7. There are some guides on the internet telling you how to Upgrade fromWindows XP to Windows 7. All these guides tell you how to upgrade from Windows XP to Windows 7, but there is a limitation that you can’t transfer the installed programs in windows xp to windows 7 and also some other settings too. Windows users might have been disappointed when it was known that there is no direct upgrade option available fromWindows XP to Windows 7.
The users need to format the current Windows XP partition and install Windows 7 over it losing all settings and files in Windows XP or the users can install windows 7 on a different partition and dual boot Windows Xp and Windows 7.
There was one correct way to transfer all settings, files, installed applications, program data, documents etc. to windows 7 from windows xp, it was done by first upgrading windows xp to windows vista and then upgrading windows vista to windows 7. But it’s a time eating process.
So other guides came up telling you to transfer windows xp to windows 7 using the migration wizard application in windows 7 DVD. Using migration wizard application users can transfer account settings, documents etc to windows 7 from windows xp but the program settings and installed programs wont work in windows 7 as the registry settings were not transferred. You need to manually reinstall all your programs installed in windows xp to Windows 7.
Windows users need not to worry as Laplink Software comes to compensate the shortcomings of Windows 7 in-place upgrades with PCmover. PCmover is capable of allowing end users to perform special "in-place” upgrades from XP to Windows 7.
According to Lap Link software,
PCmover is the ONLY migration utility that moves programs, files, and settings from your old PC to your new PC. Simply install PCmover on both your old and new computers and go! PCmover will determine which programs, files, and settings need to be moved, and when the transfer is complete, your new computer will have the personality and functionality of your old PC as well as all of its own pre-installed software. Works with almost any Windows operating system.

How to Use PC Mover to Upgrade From Windows XP to Windows 7
- Install PCmover on the Windows XP computer to be upgraded.
- Run PCmover and select the upgrade option.
- Install Windows 7, selecting the "do not reformat” option.
- Install and run PCmover which will automatically restore all applications, files, and
settings.
Pc mover can move your Installed applications and their associated settings/registry entries, including any custom software, Microsoft Office, Design Programs, PC Games, Instant Messengers, Financial and Tax Software, Spreadsheets, Photos, Videos, Music, Podcasts, Desktop Backgrounds, Icons, Browser Settings, Favorites/Bookmarks, Internet & Network Settings from Windows XP or Windows Vista to Windows 7 easily. If your computer has multiple users, PCmover gives you the option to migrate some or all of the users at once. PC mover not only works for windows Xp, but also is designed to automatically migrate older Windows releases to Windows 7.
...
Read more »
|
Tabbed browsing is one such good feature that made the web browsing so easy. It saves us a lot of time in toggling between webpages. As a result tabbed browsing has become a part of every browser now. So, how about getting this Tab feature in Microsoft Office. Usually while you are working with two different documents, you need to click on the windows taskbar to switch between them. This becomes a pain when you have a lot of work to do. Hence a Tab browsing feature in Microsoft Office can really improve the productivity and save us a lot of time.

OfficeTab is a small addon to Get the Tab feature support for Microsoft Office programs. OfficeTab will add the tab feature in Microsoft Word, Excel and Powerpoint.
Switching between documents will be a cake-walk with OfficeTab Addon. With OfficeTab addon there wont arise a problem of opening a new window in-order to open another document. After installing OfficeTab the OfficeTab Setting Center will be launched. Make sure that the Tab feature is enabled for Word, Excel and PowerPoint from there.
...
Read more »
|
Windows 7 comes with much advanced DirectX 11. Soon the DirectX 11 graphics cards from nVidia and AMD will be out on the market. Windows Vista users wont be let down by Microsoft because they have decided to make the DirectX 11 available for Windows Vista SP2 users and Windows Server 2008 SP2. Windows Vista Users will be able to access the new DirectX 11 package through the Platform Update for Windows Vista Beta. DirectX 11 is not just a single element, it is a group of technologies packed together.
 The Platform Update for Windows Vista Beta offers the complete new DirectX package, allowing end users and developers to take advantage of components such as DirectWrite, Direct2D, Direct3D 11, Direct3D 10 Level 9, and DXGI 1.1. In addition, the download will also deliver Windows Graphics, Imaging, and XPS Library updates to the WindowsImaging Components, XPS Print API, and the XPS Rasterization Service. The Platform Update for Windows Vista Beta offers the complete new DirectX package, allowing end users and developers to take advantage of components such as DirectWrite, Direct2D, Direct3D 11, Direct3D 10 Level 9, and DXGI 1.1. In addition, the download will also deliver Windows Graphics, Imaging, and XPS Library updates to the WindowsImaging Components, XPS Print API, and the XPS Rasterization Service.
After getting the Platform Update for Windows Vista Beta, customers can get the same DirectX technologies as of Windows 7 in Windows Vista SP2.
Users who are running Windows Vista RTM or Vista SP1 version need to have their operatingsystems updated to Windows Vista SP2 inorder to get the DirectX 11 update.From then onPlatform Update for Windows Vista’s DirectX refresh will be included with the future service packs such as Windows Vista SP3 and afterwards. The platform update for Windows Vista SP2 users will be provided through
...
Read more »
|
You might have come across situations where windows refuses to copy corrupted files or folders. When ever you try to copy a damaged file, windows will give an error. Recovering these files may not be difficult as it seems. BadBlocked FileCopier is a freeware utility that can help you in a situation where you might want to copy corrupted files or folders. Unlike windows own copy utility BadBlocked FileCopier is fast and it also provides certain options for copying the files. You can select Copy Method, Block size & Priority of copy process. Screen Shot of BadBlocked FileCopier
Download BadBlocked FileCopier
|
Daily computer users make a lot of changes to their system. There can be mistakes that can happen such as accidentally overwriting an important file or accidentally deleting it. What ever be it we dont (most of us) usually are reluctant to make backups. This is seriously frustrating when we have a lot of files that need to be backed up, which are changed most often. So it is really a time consuming task backing up or copying the modified files, when they are in bulk. So here is a nice software than can help you out of this tedious job of backing up/copying only the changed or modified files automatically.
 The copy changed files utility is a small tool that lets you to copy changed files from one directory to another. The copy changed files utility is a small tool that lets you to copy changed files from one directory to another. The program copies only the changed files, the non changed files will be left intact. Features of Copy Changed Files* Copy changed files only
* Multi threaded
* Append current date to destination directory for easy version maintenance
* Set from directory
* Set to directory
* Set the from date, to scan for files changed after that date
* Compare date AND time
* Maintain directory structure in destination directory
* Exclude files from copying, eg. thumbs.db
* Automatically check for new version Screen Shot Of Copy Changed Files
The program doesn’t needs to be
...
Read more »
|
it’s nice to see some thing vivid. Transformation packs are one such things that do this. A lot of Transformation packs are floating in the web which gives you the flavor of the operatingsystem you want. But most of them are just for windows users. So what if the other users too want to try them. Here is a nice windows 7 transformation pack for linux that will transform ubuntu to windows 7 easily. Many users prefer linux for obvious reasons, but when it comes to beauty they cant neglect the aero glass and other effects that windows 7 has. So this windows 7 transformation pack for linux will help you to get some of the windows 7 looks to your ubuntu operating system.
Windows 7 Transformation Pack for Linux comes with the Following.
1) Windows 7 GDM theme
2) Windows 7 Icons Theme
3) Windows 7 GTK Theme
4) Windows 7 Wallpapers
5) Windows 7 Sounds
6) Gnomenu Theme
7) Windows 7 Panel Backgrounds
8) Windows 7 Cursor theme
9) DockBar
Windows 7 Transformation Pack in Ubuntu Screen Shots to windows 7 with Windows 7 Transformation Pack For Ubuntu")

If you want complete step by step
...
Read more »
|
 Finally Search Giant has released the much hyped Google Chrome OS Source Code. Developers all over the world can dive into them to come up with more programs and ideas on improving it. According to Google their new operating system is far different from any other operating system available till now. The Chrome OS team has released a short 3 minute video which briefly explains how exactly it is different from the other operating systems. Here is a brief review of the google’s New Operating system. Finally Search Giant has released the much hyped Google Chrome OS Source Code. Developers all over the world can dive into them to come up with more programs and ideas on improving it. According to Google their new operating system is far different from any other operating system available till now. The Chrome OS team has released a short 3 minute video which briefly explains how exactly it is different from the other operating systems. Here is a brief review of the google’s New Operating system.
Here are
7 different things that make the Google OS UniqueThe Browser Itself is the Interface :If you have used the Google Chrome browser before, you wont feel anything new when you first take a glimpse on the new operating system this is because the browser is the primary interface of the operating system. Unlike Windows, Mac and Linux you don’t have a separate desktop, file explorer etc for Chrome OS. However you can open up multiple windows some thing like multiple desktops and switch between them is some what similar to the windows 7′s Alt+Tab feature with the live preview. - Google Chrome OS

Designed For Security: One of the main problem’s faced by the computer users today, are the viruses,
...
Read more »
|
Did windows restarted and you lost all of your opened programs/windows? Do you need to urgently restart the system when at the middle of a serious work? Well, this might be a situation faced by many. You’ll lose all of the opened programs and windows when windows start again. Reopening each and every window and programs back to its previous state will be a time consuming task, especially if you were working with a lot of programs and widows being opened. In such a situation, having an ability to save those opened windows and programs so, that they can be quickly restored back when windows starts, would be a time saver. Here is a great tool that will help you in such a situation. The Cache My Work tool will help you in such a situation. With Cache My Work you dont wont need to take the pain again for opening back those programs and windows before shutdown, when windows starts again. Cache My Work will help you in restoring your windows after a restart. The program usage is very simple and similar to the session savers in browsers. 
When you run the application it will how you the list of windows and programs that are currently opened. Just tick the applications and windows explorer (for opened windows), click Save and you can restart your system. Upon reboot they will be magically restored back!
...
Read more »
|
Do you have problems updating kaspersky Internet Security / Antivirus online? Do you want to update your Antivirus regularly ? . This post is in response to a question asked by one of my readers. He is a computer technician, who works with and repairs many pc’s daily, and he is a very busy person, so time management is important for him. He is a fan of Kaspersky and he recommends it to all of his clients.  Kaspersky Offline Updates How to As you know, there is no point in installing the best antivirus/internet security without being able to update it. Updating Kaspersky takes a very long time as their servers are damn slow. So, he asked me is there any other way to save time by updating kaspersky as quick as possible in computer’s with and without internet connection. In case if you don’t have a internet connection you download the kaspersky update files from your friends pc, or from else where and you can install and update kaspersky in your computer with the latest virus signature database. Here is How to Update Kaspersky without Internet. There is a tool called Kaspersky Updater that will download the latest updates for all kaspersky products, including the latest virus signature database and also the program components. - First Download the Kaspersky Updater Program from the official Kaspersky forums, you need to register there to get the program, else you can just google it, but its better to go with the reliable source to download the program. I am not giving the direct link to the program because, i am not sue whether it is legally right to give it directly. If every thing is fine i will post the download link as soon as possible.
- After downloading the updater utility, extract the contents of it in the same directory. The Updater and GUI utility must be there in the same directory. Now, start theKasperskyUpdater.exe program.
- From the shown option, choose
...
Read more »
|
Often,our systems get infected with viruses soon after a USB pendrive has been plugged in.  It is so easy to get infected these days by viruses after plugging in a pendrive to your system from unknown source (may be your friends one). Not all the security programs can defend your PC against the virus attacks carried out through USB drives. But if we can take the necessary steps, staying safe from such viruses, worms and spywares spreading through pendrives/ flash drives may not be difficult at all. Here are some softwares that can efficiently protect your system and flash drives from unknown threats and viruses. It is so easy to get infected these days by viruses after plugging in a pendrive to your system from unknown source (may be your friends one). Not all the security programs can defend your PC against the virus attacks carried out through USB drives. But if we can take the necessary steps, staying safe from such viruses, worms and spywares spreading through pendrives/ flash drives may not be difficult at all. Here are some softwares that can efficiently protect your system and flash drives from unknown threats and viruses. 1) USB Write Protector : It is a software that can help you write protecting your Pendrive. USB Write Protector only allows data to be read from the pendrives, but it won’t permit data to be written into the pendrive. This is really useful for taking your pendrive and plugging it into your friends’ or relatives’ PC, as most viruses enter pendrives unknowingly. USB Write Protector is a small program, around 190kb in size. 
After downloading the program, there’s no need for installation. Just run the program and a window will show up with just two options: Enable write Protection in your USB Flash Drive, or to Turn Off the USB Write Protection. Its that simple. You just need to pick the option and click on OK. Download USB Write Protector 2)
...
Read more »
|
With lots of new mobile phone apps and games popping up its very necessary to have a antivirus for your mobile phone. Mobile antivirus software’s do basic file scanning operations, automatic updates and also protect your smart phone from suspicious network connections. Here are some of the best antivirus software’s for mobile phones.
Is it necessary to have a antivirus software for your Mobile Phone?Well the answer depends on you and how you use your mobile phone. Antivirus software’s are necessary only if you own an high end phone with operating systems like Symbian Os 6, Windows Mobile OS, Android or later.  In this case too it is optional, but if you use your mobile phones regularly for sharing data via Bluetooth, wireless etc then the chance of getting infected by mobile viruses are high. So its better to take a necessary precaution to avoid losing your data which might be more valuable than the mobile phone itself. Though the mobile viruses are not in big number, antivirus companies reveal that they too are multiplying in number daily. So here are some Antivirus For Your Mobile Phone. In this case too it is optional, but if you use your mobile phones regularly for sharing data via Bluetooth, wireless etc then the chance of getting infected by mobile viruses are high. So its better to take a necessary precaution to avoid losing your data which might be more valuable than the mobile phone itself. Though the mobile viruses are not in big number, antivirus companies reveal that they too are multiplying in number daily. So here are some Antivirus For Your Mobile Phone. NetQin Mobile Anti-virus
Comes with a combination of firewall and real-time monitoring ensure your mobile device is safe and secure. NetQin provides optimized full scan and system management to your mobile while enhancing overall mobile performance. With NetQin mobile antivirus software installed you can surf the internet and download without worrying about virus attacks. 
...
Read more »
|
We use the sms service of our network providers a lot. Though there are numerous mobileservice providers, offering sms packs, each have its own limitations. Here is a program that will help you to send unlimited sms free onlinewithout taking your mobile phone. You can send unlimited free sms to any mobile number in India. Here is a program that will help you to send unlimited sms free onlinewithout taking your mobile phone. You can send unlimited free sms to any mobile number in India.
The Way2SMS software developed by Amit Hedge will help you in sending free sms online from your desktop. For this, you only need to register a Way2SMSaccount at (www.way2sms.com) and have the .net Framework 2.0 or higher installed. 
After running the Way2SMS Program you need to fill in the required details such as Your Mobile Number, Password, the number to which you want to send the sms and finally the sms message to be sent. With
...
Read more »
|
lenty of tools for processor stability testing and overclocking are available. Finding out the stable state of the cpu is a cumbersome process.  You need to do this by trial and error method. Moreover over processor overclocking is some thing which is very risky beginners should avoid it until they gain the knowledge to do it properly. You need to do this by trial and error method. Moreover over processor overclocking is some thing which is very risky beginners should avoid it until they gain the knowledge to do it properly.
But here is an extremely useful processor stability testing application for the intel processors. The utility is called IntelBurnTest. Intel have coded the software in such a way that amd processors wont support it. But the tool will work with even the old intel processors such as the Pentium III. 
The IntelBurnTest tool will stress the CPU, North Bridge, Memory and other computer components to their extreme limits! All you need to make sure is that your pc’s cabinet is equipped with proper ventilation and cooling. You can now easily check your processor stability,
...
Read more »
|
 The peer-to-peer Internet telephony service Skype has announced the availability of the software for Sony Ericsson smart phones. Users of Sony Ericsson smart phoes Satio, Viva and Vivaz Pro can now use skype over WiFi, 3G, GPRS and EDGE. With this you can now make free calls to your friends using skype at any apart of the world. The peer-to-peer Internet telephony service Skype has announced the availability of the software for Sony Ericsson smart phones. Users of Sony Ericsson smart phoes Satio, Viva and Vivaz Pro can now use skype over WiFi, 3G, GPRS and EDGE. With this you can now make free calls to your friends using skype at any apart of the world.
To Download Skype For Sony Ericsson phone visit http://skype.com/m from your smart phone. You will be automatically directed to the download page of skype compatible for the phone. 
Alternatively you can also visit the Sony Ericsson Play Now arena later this month. Skype for these sony smart phones cone with the following features. - Make free Skype-to-Skype calls to other Skype users anywhere in the world*
- Save money on calls and texts (SMS) to phones abroad.
- Send and receive instant messages to and from individuals or groups
- Share pictures, videos and other files.
- Receive calls to their existing online number
- See when Skype contacts are online and available to call or IM
- Easily import names and numbers from the phone’s address book
Skype for Symbian will run on any Sony Ericsson smartphone using Symbian ^1, the latest version of the Symbian platform.
|
Norton removal tool will help you uninstall norton internet security and norton antivirus completely from your pc when you encounter uninstallation errors with windows. NortonRemoval Tool 2011.0.0.15 will also help you uninstall other latest norton products too.
The tool is small in size and will support the removal of following norton 2011 products. *Norton AntiSpam 2004/2005
* Norton AntiVirus 2003 through 2007.2
* Ghost 2003, Ghost Version 9.0 and 10.0
* Norton GoBack 3.1 through 4.2
* Norton Internet Security 2003 through 2007.2
* Norton Password Manager
* Norton Personal Firewall 2003 through 2006
* Norton SystemWorks 2003 through 2007
* Norton Confidential Online 2007
* Norton Internet Security Add-on Pack
* Norton Save and Restore 1.0
* Norton 360 
Note : Before using the norton uninstall tool makes sure you have copied down your nortonproduct key as
...
Read more »
|
Did you delete your favorite songs from your ipod accidentally? Or Did you format it without thinking of the music stored in it? In case any of these happen dont do any thing in a hurry. Here is a simple free tool to recover music from an ipod which had been formatted in windows.
iPod Rescue is a nifty freeware that help you to restore music from your Windows formatted iPod in case of a hard disk failure or if a system crash destroys your iTunes installation and takes your music collection with it. 
ipod rescue runs on windows 7, Vista and XP. Before running the app make sure you have got the Microsoft .NET Framework 3.5 SP1 installed in windows. ipod rescue is portable and you could run it without installing. Restoring Music From ipod using ipod rescue- Connect your iPod to your pc.
- Click on "Select iPod” to select your ipod from the displayed window.
- Choose the songs which you want to restore.
- Choose "Rescue” to copy the songs from your iPod to your computer.
It also has the option to Customize filenames of restored songs. Download IpodRescue
|
In case of you want to check for any such non working pixel in your monitor, try using theDead Pixel Locator software. 
If you see any dead pixel on your LCD Screen, there are quite a few things you could do at your home or office. How To Repair Dead Pixels on LCD Monitor# 1) JScreenFix is an online tool to fix Dead Pixels Easily. 
The tool launches a small applet in a separate browser window and you can drag the window to the respective spot or run it in full screen. The app could fix dead pixels with in under 20 minutes. #2) Turn off the monitor. Now apply mild pressure over the pixel area and then rub the area around the stuck pixel with a soft microfiber cloth. This is important because there is a big chance of scratching your LCD Screen surface if you other clothes which have rough texture. Now with the pressure applied over the pixel area turn on your monitor. The dead pixels might be gone when you turn on the monitor. If the pixel is still stuck on your screen and does not go even after trying the above mentioned methods, you could contact the manufacturer for a replacements if the warranty claim permits so.
|
Are you looking for a way to run trial softwares forever? There are some simple as well as tricky ways to make a trial software run after its trial period has been over.
Some use special softwares to monitor the installation process of the trial softwares (so that the complete modifications done by the software installation can be tracked) and later uninstall the software completely once trial is over while some would totally reinstall windows just for the sake of running that trial software again and again. There are some other good programs which can do some date alterations so that these trial programs could be run forever. Time Stopper is a tiny utility which eliminate the time limit existing into trial software usage period. This tools support the usage of more than one trial software with it. You can configure the program to make a program to be run at a particular date. So, you don’t have to worry about altering the usual system time from the system tray. This trick might now always work with all the softwares. How to Use Time Stopper Software To Run Trial Softwares
- After opening the time stopper program, Browse and locate the exe of the program to be done
- Now choose a date and time. Make sure you choose a date that is after the program installation and is before the expiration date of the program.
- Now click open software on the desired date.
You could also create a shortcut to run the software another time without the need of opening time stopper software again. Download Time Stopper
|
One of the tiny issues with windows 7 is the compatibility of hardware’s. In some cases you need to spend a really good amount of time googling for the compatible driver. So, after getting them its always a good idea to backup those important drivers as you wont need tosearch again for these in case a windows reinstall is needed.
Windows 7 doesn’t provide a specific option to backup the drivers alone. Double Driver lets you easily do it. With Double Driver you could backup, view and restore the installed drivers in windows 7 quickly. The program usage is very easy. 
After downloading Double Driver installation package, extract the contents and run the dd.exe file. Features of Double Driver- List, save, and print drivers details
- Backup drivers from current Windows
- Backup drivers from non-live/non-booting Windows
- Backup drivers to structured folders, compressed (zipped) folder, and self-extracting capability
- Restore drivers from previous backup
- Available in GUI and CLI application
- Portable (no installation required)
The utility is small in size (2.03MB) and is easy to use.
...
Read more »
|
Storing the passwords for frequently visited sites in google chrome is a great way to save time when you need to login to those websites again and again. Most of the users do depend on the password save feature as this is very handy.
Things could go wrong if the browser wont start up and you don’t remember the password correctly. You wont be able to view those stored passwords in the browser. 
Google Chrome Password Decrypter is a small utility that would help you recover those stored passwords in google chrome without opening the browser. Google Chrome Password Decrypter is created to work on Linux, MAC OS X and Windows. One handy feature that this utility provides is the ability to export the restored passwords to a file. Download Google Chrome Password Decrypter
|
If you want to try out Google Android before buying an Android based mobile phone then you have come to the right place. Google provides an Android emulator along with the Android SDK.
If you are a developer you can test the apps you write using this emulator or if you just want to test drive an Android phone, you can do that too.
To get the Android Emulator up and running: >First, Download Java from here and install it. >Now you have to download the Android SDK from here. While downloading for windows select the Compressed .zip file, not the "recommended” .exe file. >Once that download is done, extract the contents of the .zip file. After the extraction, open SDK Setup.exe. >Now the SDK will get a list of packages available from Google. If there is an error go to Settings and check "Force https://…”. 
>Now you will be shown a list of platforms. Unless you want to try all the versions of Android, select only the versions you want to try as each Platform is about 50-75 MB in size. For the others select them then click Reject. >Now you will be able to see an "Installing Archives” dialog box. Once the download is over click on "Close”. >Next we set up the Virtual phone. Click on "Virtual devices”, then "New…”. 
...
Read more »
|
While doing multiple works on a computer, it is not odd to see large number of windows and applications pile up on your screen. This makes it very difficult to work. Instead of closing these windows why not just hide them so that you can use them when you need them only. Windows Hider is a free tool that helps you to categorize your running Applications and Windows and then hide or show them according to your needs. With this tool you can organize your Windows and Applications into different groups. 
The name of these groups can be changed and also then different groups can be hidden or shown with a single click or use of a hot key. Also, the software allows you to choose whether or not a group will be muted. The Hot keys can be set from Options> Settings. There are hot keys to hide Windows Hider,Mute sounds of all groups and also to un-mute all groups. The Hot keys can be set from Options> Settings. There are hot keys to hide Windows Hider,Mute sounds of all groups and also to un-mute all groups. In short this is a great freeware to help make working on your computer faster and more productive.
|
For those entire photo maniacs who have been long waiting for software to manage their photos with ease should now take a long deep breath as we have this latest update to share with them. Now there is a better way to view your photo collection than just scrolling them left and right on your screen. Well if you wish to make a personalized album with just a few mouse clicks then PhotoPixar is the answer. PhotoPixar is a photo application that can be used to create photos album in seconds. It allows you to create albums in a video mode. The application has a simple user interface. You can create slideshows from photos in JPG, BMP and PNG format. In order to run PhotoPixar, the specs required are Pentium 4 or above, 512 MB RAM, 20 MB Free space, Windows XP /Vista/ 7. In order to create albums with PhotoPixar just follow these three easy step below: Step 1: Import the images that you desire to be in your album. In order to import the images click the "Import Photos” button. You can also drag and drop the required photos onto the interface. 
Step 2: To add required effects to images click Add Templates from the left side. You can choose from various effects for example leaves, bubbles, dragonflies, butterflies etc. The bar on the right side can be used to change backgrounds. 
Step 3: Now click Publish Album and click the Save button to finish the process. Now if you wish to upload it on facebook click the facebook icon to share it. Or you can also click Upload to upload the album on PhotoPixar’s server. 
That’s all. Now you can create photo albums in less than few minutes.
|
Did you ever wish to record Skype call of any specific contact? If yes, then Skype Auto Recorder is there for you. It is a simple and powerful application that allows you to record voice calls of any particular contacts. The application start recording the voice calls immediately after the phone call is accepted or received by that contact and at the end of conversation, it will be saved in MP3 format. Skype Auto Recorder allow you to make "Record” and "Don’t Record” list to give you full power that whose call you want to record and whose not. 
Skype Auto Recorder has many other splendid features as well. The application does not require any actions from user except initial configuration and keep working in silent mode. The filter in this application basically filters the recorded conversation of contacts or group of contacts to different files. Using Skype Auto Recorder is the easiest thing on this earth. Just follow our guideline below and start recording conversation in Skype. Download Skype Auto Recorder Step 1: Install the extension. Step 2: Open Skype, click on "Allow access” and the extension will send the extension to system tray. Step 3: Go to system tray context menu, click on Skype icon and access the Settings dialog. Step 4: Here create Skype contacts filters. You can enable/disable recording of voice calls from unfiltered contacts. Step 5: To enable recording calls from unfiltered contacts, choose a separate folder to save the call recordings. Step 6: Now click OK to save the changes. Now the application will record calls automatically as soon as the call is accepted. A small recording sign over
...
Read more »
|
You are used to the thumbnail view for previewing image and video file types on Windows Explorer in Windows Xp.In vista this option is not seen and instead large icon types are provided by default.
Vista can display the thumbnails too.But the option to enable them is hidden by default.This is how you can get them back. - Open Windows Explorer and go to tools>Folder options.
- Select the "Advanced settings” in the view tab.
- Search for the option "Always show icons, never thumbnails”.
- Deactivate the option and Confirm the setting by clicking "Apply” and then "OK”.
- Now you have to only select an icon variant for display under "View” so that the icons get turned into thumbnails.
- You can even get the preview of the marked item in the lower part of the list view.
Note: Enabling the Thumbnail option in old Pc’s will take time to display, especially in the case of video files.
|
Don’t see the run command in Vista’s start menu like in Xp? Don’t worry.You can add the run command to vista’s start menu very easily.Here is what you have to do. - Choose properties by right clicking on the start menu.
- Select the customize button under start tab.
- Scroll down and tick the run command option.
- Select apply and then press OK.
- If you have any doubt check the screen shot below.

Select the start button now and you will see the run command.
|
Here is trick to shutdown windows like never you have done before.This trick can be used to do an emergency shut down.You will be surprised to see windows getting shut down under 2 seconds!!!. At first make sure that you don’t have any unsaved works. So here is how you do it. - Call up the task manager by pressing Ctrl + Alt + Delete or by pressing Ctrl + Shift + Esc(for vista users.Xp users too can do this.)
- Pressing Ctrl + Shift + Esc will directly call the task manager in vista.
- Now from the menu bar select the shutdown option.
- Hold Ctrl and press Turn off.

You will see windows shutting down under the blink of an eye.
We don’t recommend shutting down windows this way. Use it only in case of an emergency.
|
This trick can be used to hide the disk drives in your Computer. Go to start menu>select run the type regedit. Now Got to HKEY_CURRENT_USERSoftwareMicrosoftWindowsCurrentVersionPoliciesExplorer. Right click on the right pane and create a new Dword value. Give the name as NoDrives Give the name as it is given here. Modify it’s value and make it to 3FFFFFF(Hexadecimal). Now restart your PC. Open my computer you will not see any disk
...
Read more »
|
Here is a trick to add ” Open in New Window ” option to explorer right click menu or context menu.
This trick is applicable for Windows XP, Windows Vista and Windows 7 users. - Copy the following registry entry in notepad and save as CU.reg then just run the file and add the registry entry in windows.
Windows Registry Editor Version 5.00

 [HKEY_CLASSES_ROOTDirectoryshellopennewwindow] @="Open inside New Window"

 [HKEY_CLASSES_ROOTDirectoryshellopennewwindowcommand] @="explorer %1"

 [HKEY_CLASSES_ROOTDriveshellopennewwindow] @="Open inside New Window"

 [HKEY_CLASSES_ROOTDriveshellopennewwindowcommand] @="explorer %1"
Now you will get the option to open a folder or drive inside a new window in explorer context menu.
|
By default Vista does not make use of the full potential of the new SATA hard disk’s. We do not get the actual power of the Hard disk that we use. In order to get it we just need to make a small change. - Call up the Start menu and type Device Manager in the search box.
- Expand the Disk Drives section by clicking on the plus sign near it.
- Now Look for the internal SerialATA (SATA) drives under it.
- Right Click the disk and select properties.
- Go to the "Strategies” TAB.
- Now check the option "Enable Advanced Performance ".
- Select OK and Close the Device manager.
- Restart your
...
Read more »
|
There may be hardly few Firefox users who don’t know about the Adblock plus extension. Adblock Plus is used as the online ad filter by many users. But using a large number of self defined filters in Firefox can make it really sluggish. Long self defined filter lists makes Firefox sluggish because every page that is loaded is checked against the filters each and every time. However we can solve this problem to a great extend by optimizing the filter lists. - To start with first you have to save your filter list.
- Then go to ‘Tools‘>’Adblock Plus‘.
- From settings dialogue box open ‘Filters‘> ‘Export Filters‘.
- Open Windows Explorer and open the text file with an editor like Notepad.
- Now select the entire content of the file by pressing [Ctrl] + [A] and copy tit to clipboard by pressing [Ctrl] + [A].
- Now go to the website http://adblock.free.fr/optimize/index.php?lang=en and paste the list there by pressing [Ctrl] + [V].
- Now check the options that are set. Please check that the ‘Optimize URLs‘ and ‘Remove Filters matched by others‘ options are active.
- If you are already using an optimized list the ‘Optimize including pre-existing RegExes‘ option must be activated. This will insert new filter list to the already optimized ones.
- Now click ‘Optimize‘.
- A dialog box showing the compressed list will show up.
- Select the optimized list and copy it to a new blank text file and save it.
- Now in Adblock settings dialog box, Open ‘Filters‘> ‘Import Filters‘ and now navigate to the new text file and click on ‘Open‘.
-
...
Read more »
|
|
In Windows Xp we get six different Folder views Thumbnails, Tiles, Icons, List, Details, Filmstrip. Each time when we open different type of Folder for example we opened a folder containing pictures we see the view set to Filmstrip or so. If you want to set it in tile view you have to select form the view option. Doing this for each and every folder is really time consuming.
Setting a particular Folders view setting to all the Folders will be the easy way.To do this just go to My Documents Folder and select the type of view you want too have in all the Folders from the view options after doing that. From the menubar select tools> Folder Options and select the ‘View’ tab from it. Now click on ” Apply to All Folders ” Options and select apply and then OK.Thats it from now on you can get a common view setting in all the Folders.
|
Every windows user will be using a lot of tweaks these days for speeding up their system. I am sure all will be waiting for theRegistry tweaks for the newly born Windows 7 operating system. Here are some registry tweaks that can be safely applied after its installation or later. I am sure these tweaks can speed up Windows 7.
First of all i will tell what all changes will be made after applying the tweaks.
- Hanged programs will be terminated quickly.ie. Automatically it will end tasks of programs that are taking longer to respond.
- Menus will be shown very faster. When you pause on the main menus the sub menus will be shown up very fast than normal.
- You will get an option ” Take Ownership” when you right click on files or folders. This will become handy when you want to replace system files while doing customization.
- Make windows not to search for a program that no longer exist when you click on the shortcut there by saving your valuable time.
- Adds "Copy To” and "Move To” options in the right click context
...
Read more »
|
WinVistaClub has finally released one of the best and powerful tweaking utility for Windows (created by Microsoft MVP Ramesh). It can tweak and optimize almost every thing in Windows Vista (32-bit and 64-bit) and certain (most) tweaks work for Windows XP too!. This small and free utility will make your Windows more faster, secure and stable in a few mouse clicks.It will tweak Windows Vista to its Best. This program is made user friendly and is portable. Lets see what all it does.
 It has a lot of features.This program has an ability to detect whether you haveinstalled IE7 or IE8 and give the relevant tweaks according to the version installed on you system. Different tweaks have been organized into various sections, they are : It has a lot of features.This program has an ability to detect whether you haveinstalled IE7 or IE8 and give the relevant tweaks according to the version installed on you system. Different tweaks have been organized into various sections, they are :
1) Personalization,
2) User Accounts & UAC,
3) System & Performance,
4) Security,
5) Internet Explorer (IE7 / IE8)
6) Network Optimization
7) Additional Options
...
Read more »
|
The Send To options in the right click menu in Windows enables to work in windows Faster. After a long time the send to menu gets cluttered and it will take more time than usual for the items under send to options to appear. So here is a way to speed up or create a send to options which is clutter free…..
The steps are simple.
Just go to RUN from start button or press [WIN] + [R].
Now type sendto and press [Enter].
A window showing the list of items which under the send to menu in Windows will open up.
You can add any new link or delete the unwanted items from the send to menu.
|
You might have noticed the Windows context menu studded with certain options which you have never used or will never use. These unused options are attached to the context menu when you install an application so that it can be accessed quickly.You can remove some unwanted menu options by a simple registry tweak if it is not required…….. These unused options are attached to the context menu when you install an application so that it can be accessed quickly.You can remove some unwanted menu options by a simple registry tweak if it is not required……..
You can remove a context menu option with the help of the following methods:Click "Start” and type "regedit” in the "search” box. As the context
...
Read more »
|
The Hibernate function in Windows will enable to save the current desktop as it is when we shutdown the system. When you Turn On windows again windows will restore the previous desktop you were working with earlier. So this way if you open a lot of programs in Windows you need not start or open the programs again when windows starts up. The hibernate option is a very useful and time saver function for Daily Windows Users. You can access the ‘Standby’ or ‘Hibernate’ function by pressing [Shift] key in the Windows shutdown menu. You will be really embarrassed since you need to press the Shift key each and every timeyou need to hibernate windows. Microsoft gives this function enhancement only through a telephone call and that too for valid support customers. So how about showing a separate button for the hibernate function in the shutdown
...
Read more »
|
 Do you experience slow video buffering speeds? Thinking of how to buffer the videos faster? The videos get buffered slow at times. For users with slow internet access speed and for dialup users this is a head ache. They’ll lose the pleasure of watching videos hitch free. Usually in such cases, we pause the video and leave it for some time to get the video buffered 100%. But also wastes the time. But there is a way to speed up buffering of videos.Speed Bit Video Accelerator has come up with a solution to buffer videos faster in youtube, metacafe, Dailymotion, Bebo, CNET and other 150+ popular video sharing sites. This tool will stream the videos using multiple connection to the server of the video sharing site. The
...
Read more » Do you experience slow video buffering speeds? Thinking of how to buffer the videos faster? The videos get buffered slow at times. For users with slow internet access speed and for dialup users this is a head ache. They’ll lose the pleasure of watching videos hitch free. Usually in such cases, we pause the video and leave it for some time to get the video buffered 100%. But also wastes the time. But there is a way to speed up buffering of videos.Speed Bit Video Accelerator has come up with a solution to buffer videos faster in youtube, metacafe, Dailymotion, Bebo, CNET and other 150+ popular video sharing sites. This tool will stream the videos using multiple connection to the server of the video sharing site. The
...
Read more »
|
These days most of the computer system’s come up with loads of ram installed. 2GB is the minimum memory which people are currently asking for.  Windows 7 is a much faster and stable operating system that the previous ones. But windows will use only a definite amount of memory even if we have much more than that. Whats the remaining memory is kept as such? Keeping the programs in the memory will make the sytem much more faster and responsive as there wont be a need to search the data in the slow hard drive. Windows 7 doesn’t allow to set an custom size for the file system cache. One of our readers suggested a great tip to make windows 7 use more ram and thereby making your system much more faster and responsive than before. This tweak will also work for Windows Vista. So here’s how we apply the tweak to in windows 7. Windows 7 is a much faster and stable operating system that the previous ones. But windows will use only a definite amount of memory even if we have much more than that. Whats the remaining memory is kept as such? Keeping the programs in the memory will make the sytem much more faster and responsive as there wont be a need to search the data in the slow hard drive. Windows 7 doesn’t allow to set an custom size for the file system cache. One of our readers suggested a great tip to make windows 7 use more ram and thereby making your system much more faster and responsive than before. This tweak will also work for Windows Vista. So here’s how we apply the tweak to in windows 7. Click Start and type in "cmd” and you will see the command prompt icon. Right Click the cmd icon and choose "Run as Administrator". Now in the command prompt windows type in the following command. fsutil behavior set memoryusage 2
Now restart windows 7.
...
Read more »
|
After installing many softwares in your computer, you could notice that the startup of Windows 7 is taking too long.  This is because when you install certain programs, they are set to automatically start running at the startup of Windows 7. As the number of programs set to start during startup increases, Windows 7 takes more to startup your computer. This is because when you install certain programs, they are set to automatically start running at the startup of Windows 7. As the number of programs set to start during startup increases, Windows 7 takes more to startup your computer. Some programs like Antivirus softwares also start running with the startup of Windows. But it is a necessary one. There might be many other programs which you don’t want to start along with theWindows 7 startup. So you could remove those programs. Just do the following to remove those programs from Windows 7 startup. 1. Click on the start button. 2. Type msconfig in the search box and open it. 3. Select the Startup tab. 4. Uncheck the programs you don’t want to start during startup. 5. Click on OK and then Apply. 6. To finish off the procedure, restart your system and you are done. Now the programs you selected will be removed and will not run at Windows 7 startup anymore unless you enable them again using msconfig.
|
The USB Flash drive Autorun function is a great bless for many users. But still there are people who find this feature annoying or useless as it might not be comfortable for them. So if you want to disable the Autorun in pen drive, then here are the instructions to do it easily in Windows. Disable Autorun in Pen Drive in Windows XP, Vista or 7 1. Type in ” gpedit.msc ” in Run to open Group Policy Editor. 2. Navigate to Computer Configuration > Administrative Templates > System. 
3. In the right side, double click on ” Turn off Autoplay ". 4. Check the enabled option and change the ” Turn off Autoplay on ” option to ” All drives ". 5. Apply the changes to disable autorun of pen drive. That’s it! The Autorun feature will be now disabled.
|

To install Froyo manually on your Droid Incredible all you have to do is follow these steps:
>Check if you are on a stock ROM as this update will work only if you are. >Download the Official Android 2.2 Firmware. >Make a copy of the downloaded file to the root directory which is your microSD and name it as "update”.zip. >Switch Off your phone. Now reboot it with Volume down button pressed. >Now in the bootloader screen select recovery using volume keys to navigate and power button to select. >Upon seeing the "/!” symbol press volume up and power to show recovery options. As earlier use volume keys to navigate and power button to select "apply sdcard:update.zip”. >When the installation completes you will see "Install for sdcard complete”, now just select "reboot system now” to finish.
|
The new Internet Explorer comes packed with features but if you are not happy with it then we have a tool for you which may change your mind. IE9 Tweaker v1.0 is a great tool which helps you make many modifications to your Internet Explorer 9. With this, you will be able to make changes such as making the menu bar always visible (to make menu bar visible the first time,you may have to press Alt key) (if switch this off menu bar will be always invisible), adding menu bar on top, setting InPrivate Filtering to Always ON, Adding 3D Border between the Web page and toolbar, Making Internet Explorer Start Up in to Internet Explorer in Full screen mode, Changing Size of Toolbar icons, Changing the maximum number of Simultaneous Downloads and Rows in the Favourites Home Page. 
Like other Browsers Internet Explorer 9 also will keep track of your history and make a favourites page from that data. But using IE9 Tweaker v1.0 helps you create the Favourites page by yourself. To do so, Firstly click "Create Custom Favourites Homepage" which will open a new Window as seen below. 
Just edit the Home Page by adding the Web Addresses and you are done. Just make sure you select "Set homepage to custom page”. This comes in handy if you find new sites or if you like to keep The Favourites Page organized.
|
Having a good Internet connection your phone is great, but it is definitely a let down if you can’t use the same phone as a modem for your computer. It is also cheaper to just use the same connection for both devices. Here is a really simple and quick way to use your Android Phone as a Modem for your PC. It does not even require a rooted device. All you require are : An Android Phone with Internet connection, a computer , a little software called PDAnet and your Android phone’s USB Cable. 
PDAnet is a great software to tether your Android Phone. But the full version costs around $15. It does allow a trial period and even after the trial period you can browse the Internet but the only problem is not being able to use secure connections. So you won’t be able to use Gmail etc. But if you are tethering just for emergency situations for browsing sites then should just use trial as you can always check your email from your phone. But buying the app for $15 is much better than paying around the same thing but on a monthly basis to your cellphone company. |
Portable devices have become a part of our daily life. Most of us today own a Laptop for obvious reasons. Most of us love it because it is portable and very useful. But some thing that most of the Laptop owners feels distressful is about the battery life of Laptops. So, the battery life of the Laptops play a crucial role. We strive to preserve the battery power for getting enough time to save our work. So it is essential to know how much charge is left on the battery to finish up our work without any worries. Windows have an inbuilt Laptop Battery Meter which shows off the percentage of charge left on the Laptop’s battery and the time left for using the Laptop without direct main power supply. But this information provided by the Laptop Battery Meter in windows is not accurate and the information we get from it is very limited. BatteryBar is a simple and powerful tool that is a good replacement to the outdated windows inbuilt Laptop Battery Meter. BatteryBar shows the status of your Laptop’s battery in the windows taskbar. Unlike Windows inbuilt Laptop battery meter BatteryBar shows the most accurate time remaining on your battery. Screen Shots of BatteryBar


...
Read more »
|
Do you want an additional partition to be created for your system? Then here’s a tutorial on creating a partition on the PENDRIVE. Note that this is an advanced tutorial so it is advised that you should try it only after having a firm grip over the procedure. Before you start, it is important for you to know that pendrive is detected as an operatingsystem so in order to make a partition on the pendrive you have, portray the pendrive as a hard drive to the system. By creating numerous drives you are able to save your important data and protect it from viruses during the process. Before starting the STEP 1, make a backup of your pendrive since you might need to format it during the process and download the drivers you will need during the process. Download USB drivers Now just trail these easy steps and you will be done! Step 1: Plug in your USB drive and open device manager. Now you will be able to see the hardware devices that are connected to your computer. Simply scroll down to the disk drives and click on it and then on the "properties” button. 
Step 2: Once the pendrive properties window opens, choose detail tab and then "device instance path”. When you see a string of characters, copy it and close the window. 
Step 3: Now open the folder of USB drivers you had downloaded and open the file named "cfadisk.inf ” in any text editor notepad or wordpad. Step 4: Once done,
...
Read more »
|
You might have noticed slow copy speeds with some pen drives. Here is a tweak which help in increasing the speed or giving a speed boost to your pendrive. By enabling this tweak, the write caching option in windows will be enabled. - Plug in your USB Drive.
- Then Open My Computer> right-click on your USB Drive >click Properties.
- Select your USB drive Under Hardwares and choose Properties.
- You will see a dialog box saying ” Optimize for quick removal”.This option is selected by default.
- Select "Optimize for Performance”option.
- Now, remove USB drive and plug it again.
- Copy some files from the drive to your system or vice-versa. You can notice the speed increase.
After enabling this option in windows, make sure you use the Safely remove hardware option in windows each time you remove the removable drive from windows otherwise you might encounter errors with the pendrive. Though the tweak might not give exceptional speed boost to your usb drive but it will come in handy while copying large files.
|
Are you looking for some fresh new music to listen to at home or at work? With Antenna you can listen to online radio stations from all over the world. Note: Requires Adobe AIR (download link at bottom of article). Antenna in Action Once you have completed the installation and started Antenna up this is the window that you will see. The left side will have a "browsing pane” where you can search for the stations that you would like to listen to using the various categories. Based on the stations that you choose the background map will change location to match the stations locations. 
Here is a closer look at the "Categories Bar”. 
For our first example we used the "Country Category” to find our first station to listen to. When you choose a country you will be presented with a list of the stations available for that country. To start listening to a particular station just double click on the appropriate entry line. 
A closer look at the "browser pane” with our first station playing. Notice the "Reliability Indicator” that will be available for each listing…some may be better than others and you can use this to choose the best streaming stations from the list. 
In the upper left corner you will notice three icons…each will open a small pop-up window with a specific purpose. 
The first icon will open up the "About Window”. If you need to contact Antenna’s creator or would like to place a request for a station to be added to the app then this is the best way to do it. 
The second icon will open up a Antenna specific chat window. 
The third icon will allow you to set a default location and make adjustments to some of the app’s settings. 
Recording Audio The "Recording Function” is the only area where we experienced some "quirkiness” with the app. To start recording press the "Round White Button”… Note: Based on feedback on the app creator’s webpage some people have experienced the same problem as we did during our tests with the app failing to complete the recordings. Hopefully this bug will be fixed with the next release. 
Once recording has started the button will turn red. Click on the button again to stop recording. 
Once you have stopped recording you will see the following message window appear and the main window will be shaded over with a whitish color until you click "OK”. 
Conclusion Regardless of the slight quirkiness in recording online music Antenna more than makes up for it with the terrific selection of online stations and streaming capability. New fresh music for you to listen to is only a click or two away… Links Download Antenna (Antenna Homepage) Download Antenna at Softpedia Download Adobe AI
...
Read more »
|
Ubuntu is one of the most popular versions of Linux, and their Netbook Remix edition is especially attractive for netbook owners. Here we’ll look at how you can easily try out Ubuntu on your netbook without a CD/DVD drive. Netbooks, along with the growing number of thin, full powered laptops, lack a CD/DVD drive. Installing software isn’t much of a problem since most programs, whether free or for-pay, are available for download. Operating systems, however, are usually installed from a disk. You can easily install Windows 7 from a flash drive with our tutorial, but installing Ubuntu from a USB flash drive is more complicated. However, using Wubi, a Windows installer for Ubuntu, you can easily install it directly on your netbook and even uninstall it with only a few clicks. Getting Started Download and run the Wubi installer for Ubuntu (link below). In the installer, select the drive you where you wish to install Ubuntu, the size of the installation (this is the amount dedicated to Ubuntu; under 20Gb should be fine), language, username, and desired password. Also, from the Desktop environment menu, select Ubuntu Netbook to install the netbook edition. Click Install when your settings are correct. 
Wubi will automatically download the selected version of Ubuntu and install it on your computer. 
Windows Firewall may ask if you want to unblock Wubi; select your network and click Allow access. 
The download will take around an hour on broadband, depending on your internet connection speed. Once the download is completed, it will automatically install to your computer. If you’d prefer to have everything downloaded before you start the install, download the ISO of Ubuntu Netbook edition (link below) and save it in the same folder as Wubi. 
Then, when you run Wubi, select the netbook edition as before and click Install. Wubi will verify that your download is valid, and will then proceed to install from the downloaded ISO. This install will only take about 10 minutes. 
Once the install is finished you will be asked to reboot your computer. Save anything else you’re working on, and then reboot to finish setting up Ubuntu on your netbook. 
When your computer reboots, select Ubuntu at the boot screen. Wubi leaves the default OS as Windows 7, so if you don’t select anything it will boot into Windows 7 after a few seconds. 
Ubuntu will automatically finish the install when you boot into it the first time. This took about 12 minutes in our test. 
When the setup is finished, your netbook will reboot one more time. Remember again to select Ubuntu at the boot screen. You’ll then see a second boot screen; press your Enter key to select the default. 
Ubuntu only took less than a minute to boot in our test. When you see the login screen, select your name and enter your password you setup in Wubi. Now you’re ready to start exploring Ubuntu Netbook Remix. 
Using Ubuntu Netbook Remix Ubuntu Netbook Remix offers a simple, full-screen interface to take the best advantage of netbooks’ small screens. Pre-installed applications are displayed in the application launcher, and are organized by category. Click once to open an application. 
The first screen on the application launcher shows your favorite programs. If you’d like to add another application to the favorites pane, click the plus sign beside its icon.
...
Read more »
|

Opera, like all popular web browsers, contains features that sacrifice privacy for convenience. Opera contains some features that send every website you visit to its servers, but also offers excellent, fine-grained control of cookies. One notable omission from Opera is the "do-not-track” feature found in Firefox, Internet Explorer and Safari. In Opera’s defense, most websites ignore the do-not-track request and track you anyway. Opera TurboOpera Turbo, a feature from Opera’s mobile browsers, uses Opera’s proxy servers to speed up your browsing on slow connections. The proxy servers compress the web pages before you receive them, saving you download time. Encrypted connections to your bank and other secure sites aren’t proxied. This can help a lot on slower connections, but it’s unnecessary on fast connections. You can disable Opera Turbo to prevent your browsing activity from going through Opera’s servers. First, open Opera’s Preferences window under Settings in the Opera menu. 
Click over to the Webpages tab and you’ll see the Opera Turbo settings near the top of the window. 
You can select Off from the drop-down menu or click Details to see more information. 
Search SuggestionsLike other browsers, Opera sends each keystroke you type into the search box to your default search engine. The search engine responds with suggestions based on what you’re typing. 
This only transmits queries you type into the search box — which you’ll probably send to your default search engine anyway — but you can disable this feature by unchecking the Enable Search Suggestions check box on the Search tab. 
CookiesCookies are often used by advertisers to track you online, but websites also use cookies for legitimate purposes, such as saving your login state and website preferences. Click over to the Advanced tab and click Cookies in the sidebar to view your cookie settings. Select the "Accept Cookies Only From the Site I Visit” option to reject third-party cookies, which are often used by advertisers. Most websites will work properly if you select this option, but you can change it back to "Accept Cookies” if you encounter a problem. 
The "Delete New Cookies When Exiting Opera” check box allows you to keep cookies enabled so websits will work properly, but discards them each time you exit Opera so you can’t be tracked. The downside is that you’ll have to log back in to each website you use when you open Opera — unless you use the Manage Cookies dialog to save these cookies between browser sessions. 
If you want to enable this option, you should also click Manage Cookies and clear away the cookies you don’t need. Any cookies already in here will be preserved, so you can save your How-To Geek cookies if you want to stay logged into How-To Geek. 
Fraud and Malware ProtectionOpera’s Fraud and Malware Protection feature, enabled by default, helps protect you online by displaying a warning message when you access a fraudulent website or one that contains malware. To provide this feature, Opera sends the domain name of each website you visit to Opera’s servers. Opera promises that this data is anatomized and they don’t use it to track you. Other popular web browsers compare most websites you visit against a local list of known-bad websites, so Opera’s architecture isn’t ideal for privacy. This feature does help protect you, but you can disable it if you’re not comfortable with Opera transmitting this information. Just uncheck the "Enable Fraud and Malware Protection” check box on the Security pane. 
|
If you are doing any kind of PHP development, you’ll almost always be using Apache along with it. Here’s the quick and easy way to get PHP up and running on your Ubuntu box. First, you’ll want to add the extra repositories to Ubuntu’s sources.list file. From a command shell, you will run the following commands: sudo apt-get install apache2 sudo apt-get install php4 sudo apt-get install libapache2-mod-php4 sudo /etc/init.d/apache2 restart
Note that if apache is already installed you can omit the first line. Your web files will now be found in /var/www/ Note that this is nearly the same as installing PHP5, which is the latest version.
|
Visual Studio 2003 has a splash screen that is unnecessary and adds time to launching. To disable this, simply right click on the shortcut to Visual Studio and choose Properties. 
Add in the text /nosplash after the end of the Target line, as shown in the screenshot above. No more splash screen.
|
Would you like to use Hotmail, Office Web Apps, Messenger, and more on your website domain? Here’s how you can add Windows Live to your website for free. Microsoft offers a popular suite of online communications products including Hotmail and Messenger. Although Hotmail hasn’t been as popular in recent years as Gmail, it is getting a refresh this summer that might make it an even better email solution. Additionally, the new Office Web Apps offer great compatibility with Office documents. While Skydrive offers 25Gb of free online file storage for all users, so Windows Live can make a great communications solution for your domain. Note: To signup for Windows Live for your domain, you will need to be able to add info to your WordPress.com blog or change Domain settings manually. Getting Started Open the Windows Live Custom Domains page (Link below) to get started adding Windows Live to your domain. Your free Windows Live account will let you create up to 500 accounts, so it’s great for teams and groups that want to have customized email addresses in addition to those who just want an email account for their website. Enter your domain or subdomain you want to add to Windows Live in the box, and then select whether you want to setup Hotmail with this or now. We want to add email to our domain, so select Set up Windows Live Hotmail for my domain and click Continue. ![sshot-2010-06-04-[11-47-15]](http://www.howtogeek.com/wp-content/uploads/2010/06/sshot20100604114715.png)
You’ll need to sign in with a Windows Live ID to create the account, or choose to create a new Windows Live account associated with your domain.  Sign in with your Windows Live ID…this can be a Hotmail, Live Messenger, XBOX Live, Zune ID, or Microsoft.com account. 
Or, enter your information to create a new Windows Live ID if you selected the second option. 
Now, review your settings and make sure everything looks correct. Click the I Accept button to setup your account.  Your account is now fully setup, but you’ll need to add or edit DNS information on your site. The steps are slightly different depending if your site is hosted on WordPress.com, on your own server, or hosting service. We’ll show you how to do it on either one. 
First, though, note the information below this box. You’ll see settings for your Mail setup…  Security settings…  And Messenger integration. Make note of the settings, especially the circled ones, as we’ll need them in the next step. 
Integrate Windows Live with Your WordPress Blog If the domain you added to Windows Live is for your WordPress blog, login to your WordPress dashboard in a separate browser window or tab. Click the arrow besideUpgrades, and select Domains from the menu. 
Click the Edit DNS link beside the domain name you’re adding to Windows Live. 
In the text box on this page, enter the following, replacing Your_info with your code from the Mail Setup box in your Windows Live Dashboard. Note that this is the blurr
...
Read more »
|

If you want to put a video on your Android phone, you’ll probably need to shrink it down to fit the size of the screen and make it take up less space. There’s lots of conversion software out there, but did you know you can do it with VLC? There’s a lot more you can do with VLC, for instance, you can also copy a DVD with VLC, take snapshots of your favorite movie scenes, or you can use it to convert video from one type to another. Before you convert any videos, you need to know the encoding specification of your phone. For example, this is the video encoding specification of Droid X. 
Add as many videos as you want, and when you are ready, click the "convert/save” button to adjust their size, or video file type. 
Choose "convert” to adjust the video size. 
Pick a folder, an appropriate file name, and a video file type under the profile section. 
VLC can convert your media files into different video file types. Ogg, mp4, divx, are only some of video file types that VLC supports. 
Click the profile button, and specify custom settings that are compatible with your Android specification. 
Give the new profile an appropriate name. 
Check the settings under the video and audio, and change them to match the video encoding of your Android. We found that ogg produced smaller videos compare to other file types. 
A media file contains a video, an audio stream, or both – and VLC lets you control the media stream that you want to produce. If you are only interested in listening to the music, untick the Video check box under the video codec tab, and select the audio stream under the audio codec tab. 
You can reduce the file size even further by lowering the video or audio bitrate, but of course, you’ll get a video with a bad quality. 
Once you have confirmed the settings, save the profile, and click the start button. 
VLC will enter a streaming mode, and depending on the video, this may take some time. Once the seek bar reaches the end, you should see a new video under the specified destination file folder. 
Once you’re done
...
Read more »
|
If you google around on the web you will find there are several tutorials on how to make your Ubuntu Linux installation run faster — especially on older hardware. These tips are very useful and range from minor tweaks to major overhauls. Being an intermediate Linux user myself, I found some of the more difficult optimizations to be overwhelming and not something I would want to try at home — changes to how Linux writes to the hard drive, for example. While researching and implementing the optimizations I felt comfortable with on my older Dell laptop and my new Asus eeePC 901, I jotted down all of my notes for future reference. Below are some tips for the intermediate user on how to optimize your laptop (or desktop) running Ubuntu Linux. Reduce SwappinessMost laptops have enough RAM installed that the swap space on the hard disk shouldn’t really be used. Yet the default setting for swappiness in Ubuntu is 60. By lowering it to 10 we can reduce the number of read/writes the the hard disk. This is especially handy for netbooks with solid state drives in them. To reduce the swappiness, follow these steps: sudo sysctl -w vm.swappiness=10- Add the following line to /etc/sysctl.conf
vm.swappiness=10
PreloadPreload is an adaptive read-ahead daemon that monitors running applications and analyzes them for commonalities. It then uses this data to predict what applications you might run and preloads them into memory. The result is faster startup times for commonly used programs. Installing preload is as easy. Just run the following line in a terminal window: sudo apt-get install preload
» For further explanation, read this article on loading applications quicker in Ubuntu using preload.
Boot-Up ManagerThe Boot-Up Manager (BUM) is a useful utility for starting and stopping boot-up scripts. Once installed it will appear in the System -> Administration menu. You can use BUM disable unnecessary boot-up scripts that may be slowing down your boot time. For example, I disabled saned, an API library for scanners, because I know I’ll never be attaching a flatbed scanner to my laptop. To install BUM: sudo apt-get install bum
» Read the documentation for Boot-Up Manager Startup ApplicationsIf you are using Gnome for your desktop manager there will be an option to select which applications are started when you login. Go to System -> Preferences -> Startup Applications and uncheck the programs you don’t need. For example, I disabled the Evolution Alarm Notifier because I don’t use Evolution for setting alarms. I also disabled the Remote Desktop server, UME Desktop Launcher, and UNR Launcher. Just be careful to uncheck them and not remove them. In the case that you’ve removed something critical, you’ll want to be able to get it back. Replace Metacity with OpenboxOpenbox is a minimalistic and lightweight window manager that is known to run much faster than metacity, its bulkier counterpart. And you can easily get it working while still using Gnome as your window manager / desktop environment. By running Openbox inside the Gnome environment your desktop will become cleaner and faster. To install it, follow these steps: - Install openbox using:
sudo apt-get install openbox obconf openbox-themes - Setup openbox as the default window manager by adding an entry in Startup Applications.
To do this, go to System -> Preferences -> Startup Applications and enter the following:- Name: Openbox
- Command: openbox ––replace
Note: According to the Openbox documentation
...
Read more »
|
1. Create a new Virtual Machine using Oracle VM VirtualBox
2. Enter a name for your new Virtual Machine Thin Client.
3. Give your New Virtual Machine between 512 MB and 1 GB of RAM.
4. De-select the 'Boot Hard Disk' option as the Thin Client will boot over the network.- Click Next and ignore the Warning Message that follows by clicking Continue, and Finish.
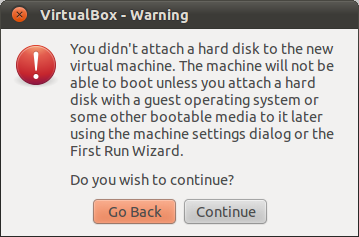
5. Set your VirtualBox Thin Client to PAE boot from the network LTSP server.- Your VM is now created, but before we can boot the thin client, we need to modify a few things.
- Click on Settings for you new VM and select the system tab on the left.
- Under Boot Order - De-select all other Boot devices except the Network or move it to the top of the Boot Order.
6. Change the network settings of your VirtualBox Thin Client- Click on Settings for you new VM and select the network tab on the left.
- Modify your network settings as needed.
- IMPORTANT: Select the Advanced settings and make sure you select the PCnet-FAST III (Am79C973) as the adaptor type. This adaptor is PAE boot enabled, the default adaptor not.
 7. Boot you VirtualBox Ubuntu LTSP Thin Client.- Start you new VM and if you have a running LTSP server configured on your network you should be able to connect and login.
- Examples of the default Ubuntu LDM login screen and Ubuntu 11.04 LTSP server running thin client with Unity 2D below.

Tags
|

SkyDrive is an online storage system included in Windows Live, which gives you 25 GB of space that you can sync to your desktop. Here’s how to connect it to your Windows 7 computer as a mapped drive. First of all, you need to go to http://skydrive.live.com and use your Windows Live account (the same you use to access Hotmail, Messenger, Windows Live Mail or MSN) to log in and create the folders you want to use by using the New menu. You can create private and shared folders and customize the access for every one of them. 
After your have created your folders, you will need to link your computer to your online ID so it can access them without asking for credentials every time. Click on the Start Menu button and select Control Panel. 
Select User Accounts and Family Safety. 
Go to User Accounts. 
Click on Link Online IDs located on the left side of the window. 
Click on Link Online ID. 
If you haven´t installed the Windows Live ID provider, you will be taken to a website to download it. 
Install the Online ID provider. 
Now you will be taken back to the Online ID providers and click on Link Online ID to sign in. 
Now you have to enter your credentials and click on Sign In. 
Now you have linked your computer to your Windows Live account. If you update your password, you can click on Update credential and if you want to disconnect your computer to your account, you can click on Remove linked ID. 
Now, to get the address where to map your SkyDrive´s folders, you can open Excel, Word, PowerPoint or OneNote 2010 click on File and then on Save & Send. 
Select Save to Web and then click on the folder you want to map. 
Double click on the folder you want to map and copy the folder´s address. 
Now, you have to go to Computer. 
Click on Map network drive. 
...
Read more »
|
You’re likely reading this article because you’ve noticed moe.exe running in Task Manager and are wondering why it it using up memory and CPU time. You’re not running program named Moe, so where is this process from and what is it doing running on your computer? So What Is It? No worries! Moe.exe is not the name of some malicious software infecting your system. Moe.exe (Mesh Operating Environment) is the core syncing engine for the new Windows Live Sync Beta, as well as the older Live Mesh. The new Live Sync is based on Mesh technology, and still includes the same syncing engine. This lets you synchronize folders between your computers and online storage at SkyDrive. Even if you do not use Live Sync, you may have it installed if you installed the new Windows Live Essentials beta. You may notice it consuming a fair amount of CPU resources while it is syncing your files or checking for changes. Unfortunately, Live Sync currently is slightly resource intensive; hopefully performance will be improved before the final release. 
You may notice some other processes related to Live Sync. These include WLSync.exe, which is the user interface for Live Sync, and WLRemoteClient.exe, which will be running if you are connected to a remote computer via Live Sync. 
Close Live Sync To make sure your files stay synchronized whenever there are changes, moe.exe runs automatically at startup. If you need to free up system resources, you can exit Live Sync from the tray. Right-click the icon and select Exit. 
Select Close Sync at the prompt. This will exit WLSync.exe, moe.exe, and any other related processes. 
You can run Live Sync as normal later if you need to sync your files again. Kill the Processes Directly If instead you try to kill the moe.exe process directly in Task Manager, it will be automatically restarted by WLSync.exe. Generally exiting it as above is the best way, but if the process is unresponsive, kill WLSync.exe first, and then kill moe.exe. 
Keep Moe.exe from Automatically Running As mentioned previously, Live Sync will automatically run when you boot your computer. If you’d rather only run it manually, you can remove it from startup and then just launch the program when you need to sync files.
Launch msconfig.exe from the Start menu search or the Run command, select the Startuptab, and unselect the box beside Windows Live Devices, then click OK to save your changes. 

You may be asked to restart your computer to apply the changes, but you can just restart later. Either which way, Live Sync will now only run when you launch it directly. 
Remove Live Sync and moe.exe If you don’t use Live Sync and would rather uninstall it, open Add/Remove Programs in Control Panel, select Windows Live Essentials Beta, and then click Uninstall/Change. 
Click Remove one or more Windows Live programs in the Uninstall window. 
Check the box beside Sync, and then click the Uninstall box at the bottom. This will fully remove Live Sync, along with its related processes like moe.exe.
...
Read more »
| |


 in Windows 7")


 - G-Trigger”style=”float:left; margin:0 10px 0 10px;cursor:pointer; cursor:hand;width: 97px; height: 130px;” src=”http://g-trigger.kneps.com/images/stories/temp/c52e9653115280d2bb4d2bc2171ea0d6.jpg” border=”0″ alt=”Control Mobiles by Shaking – OSD Left to Right witn G-Trigger


 to windows 7 with Windows 7 Transformation Pack For Ubuntu")


